
ULTIMATE Website Hosting on AWS S3 and CloudFront from Scratch: A Beginner's to Advanced Guide


This guide will show you how to host a static website (websites with content that doesn't change frequently, like HTML, CSS, and JavaScript) on Amazon Web Services (AWS) using S3 and CloudFront. No coding experience required!
What is AWS S3?
Imagine S3 as a giant online storage locker. You can upload all your website's files (like images, code, and text) to S3, just like putting things in your locker. But this locker is special - it lets people access your website files from anywhere in the world!
What is CloudFront?
Think of CloudFront as a network of servers spread across the globe. When someone visits your website, CloudFront delivers the files from the server closest to them, making your website load super fast – no matter where they are!
Creating Your First S3 Bucket:
Ready to dive in? Here's a step-by-step walkthrough:
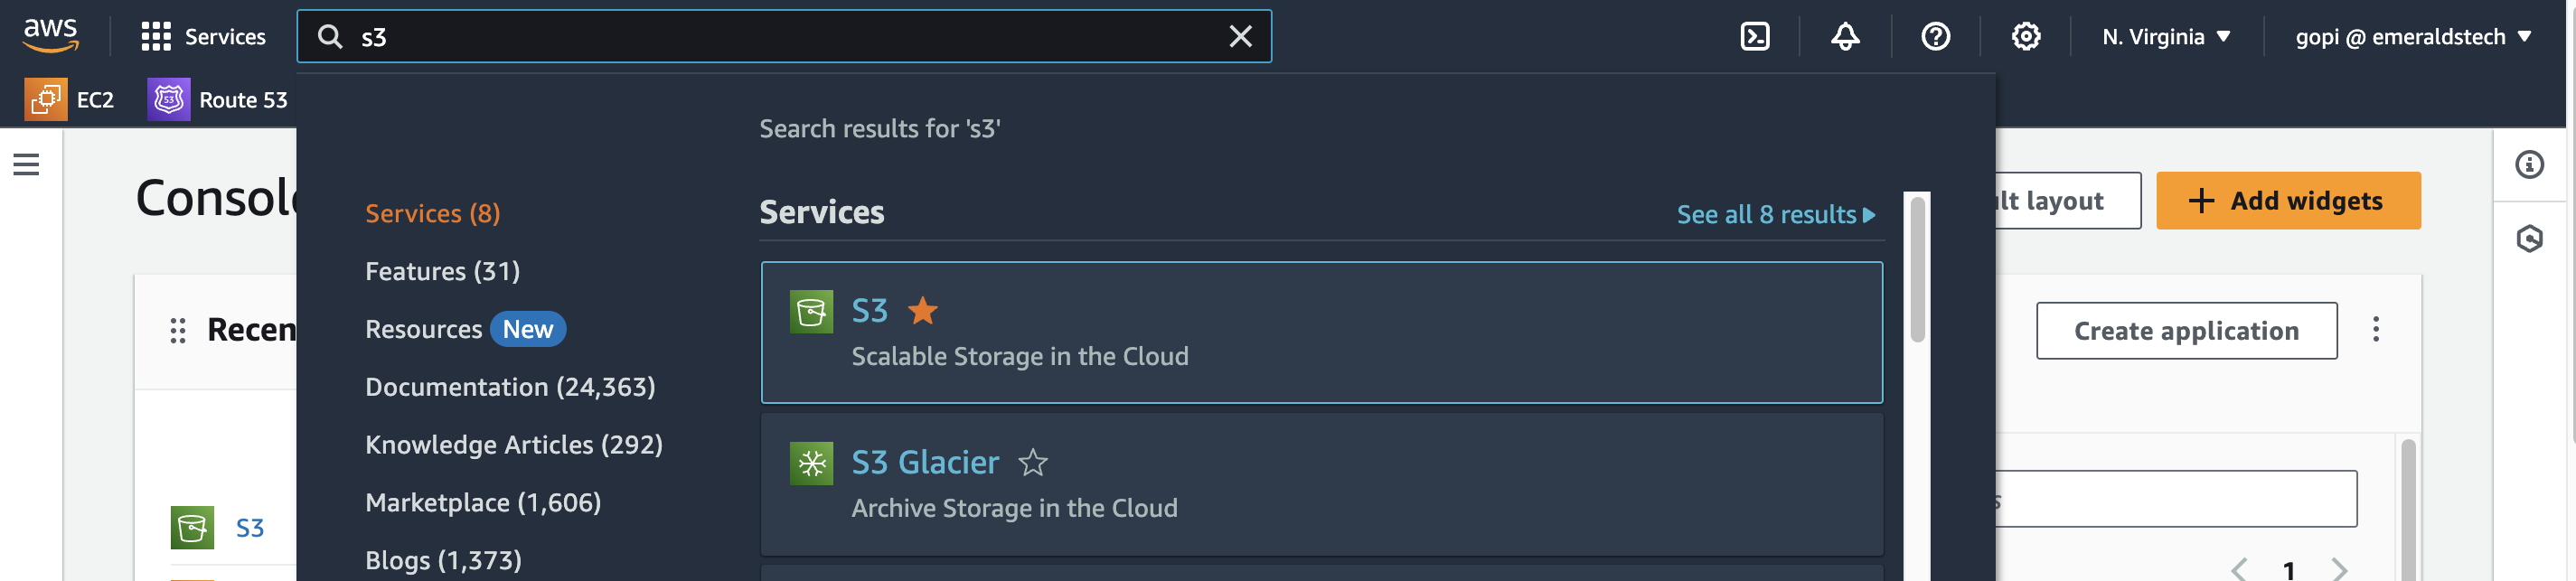
Head to the AWS Management Console: Log in to your AWS account and navigate to the AWS Management Console (https://aws.amazon.com/).
Search for S3: In the search bar, type "S3" and select "Amazon S3" from the search results.
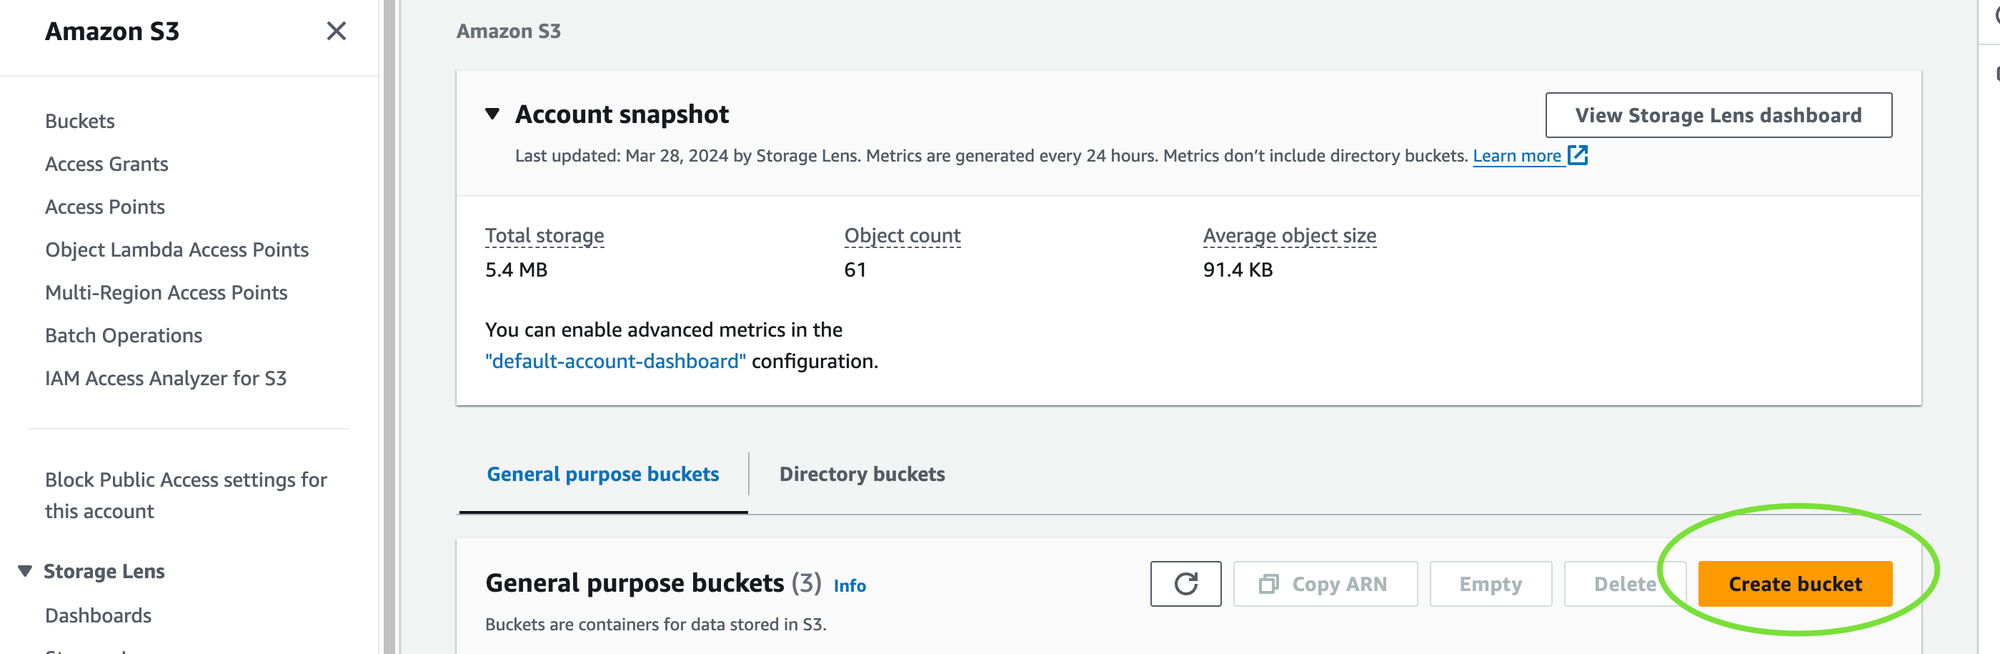
Click "Create Bucket": This button will initiate the bucket creation process.
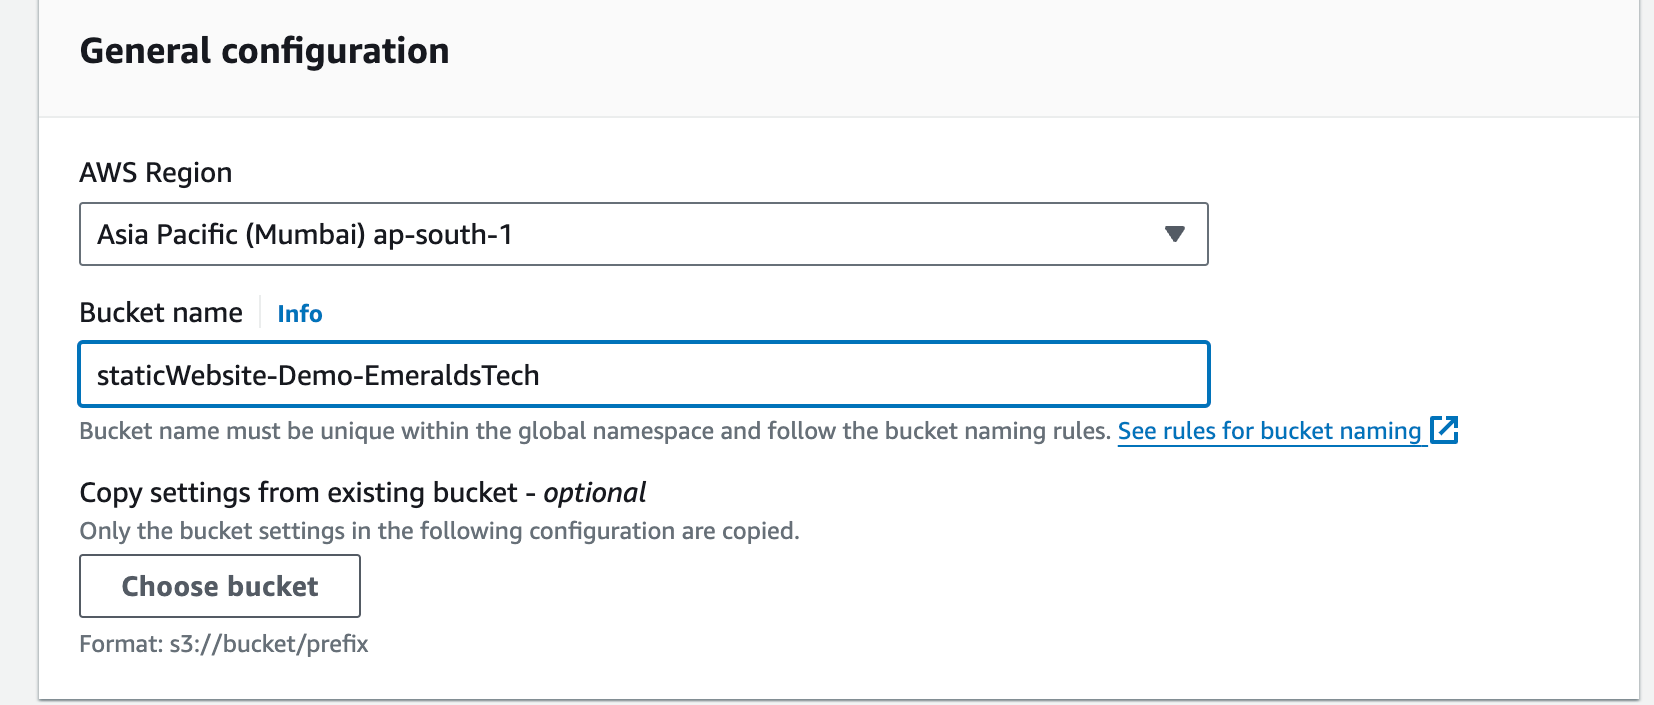
Choose a Bucket Name: Select a unique and descriptive name for your bucket. Remember, bucket names need to be globally unique within the AWS domain.
Region Selection: Choose the AWS region where you want your bucket to be located. Ideally, select a region closest to your target audience for optimal performance.
Bucket Options (Optional): Leave the default settings for now unless you have specific access control requirements.
Review and Create: Double-check your selections and click "Create Bucket" to bring your new S3 bucket to life!
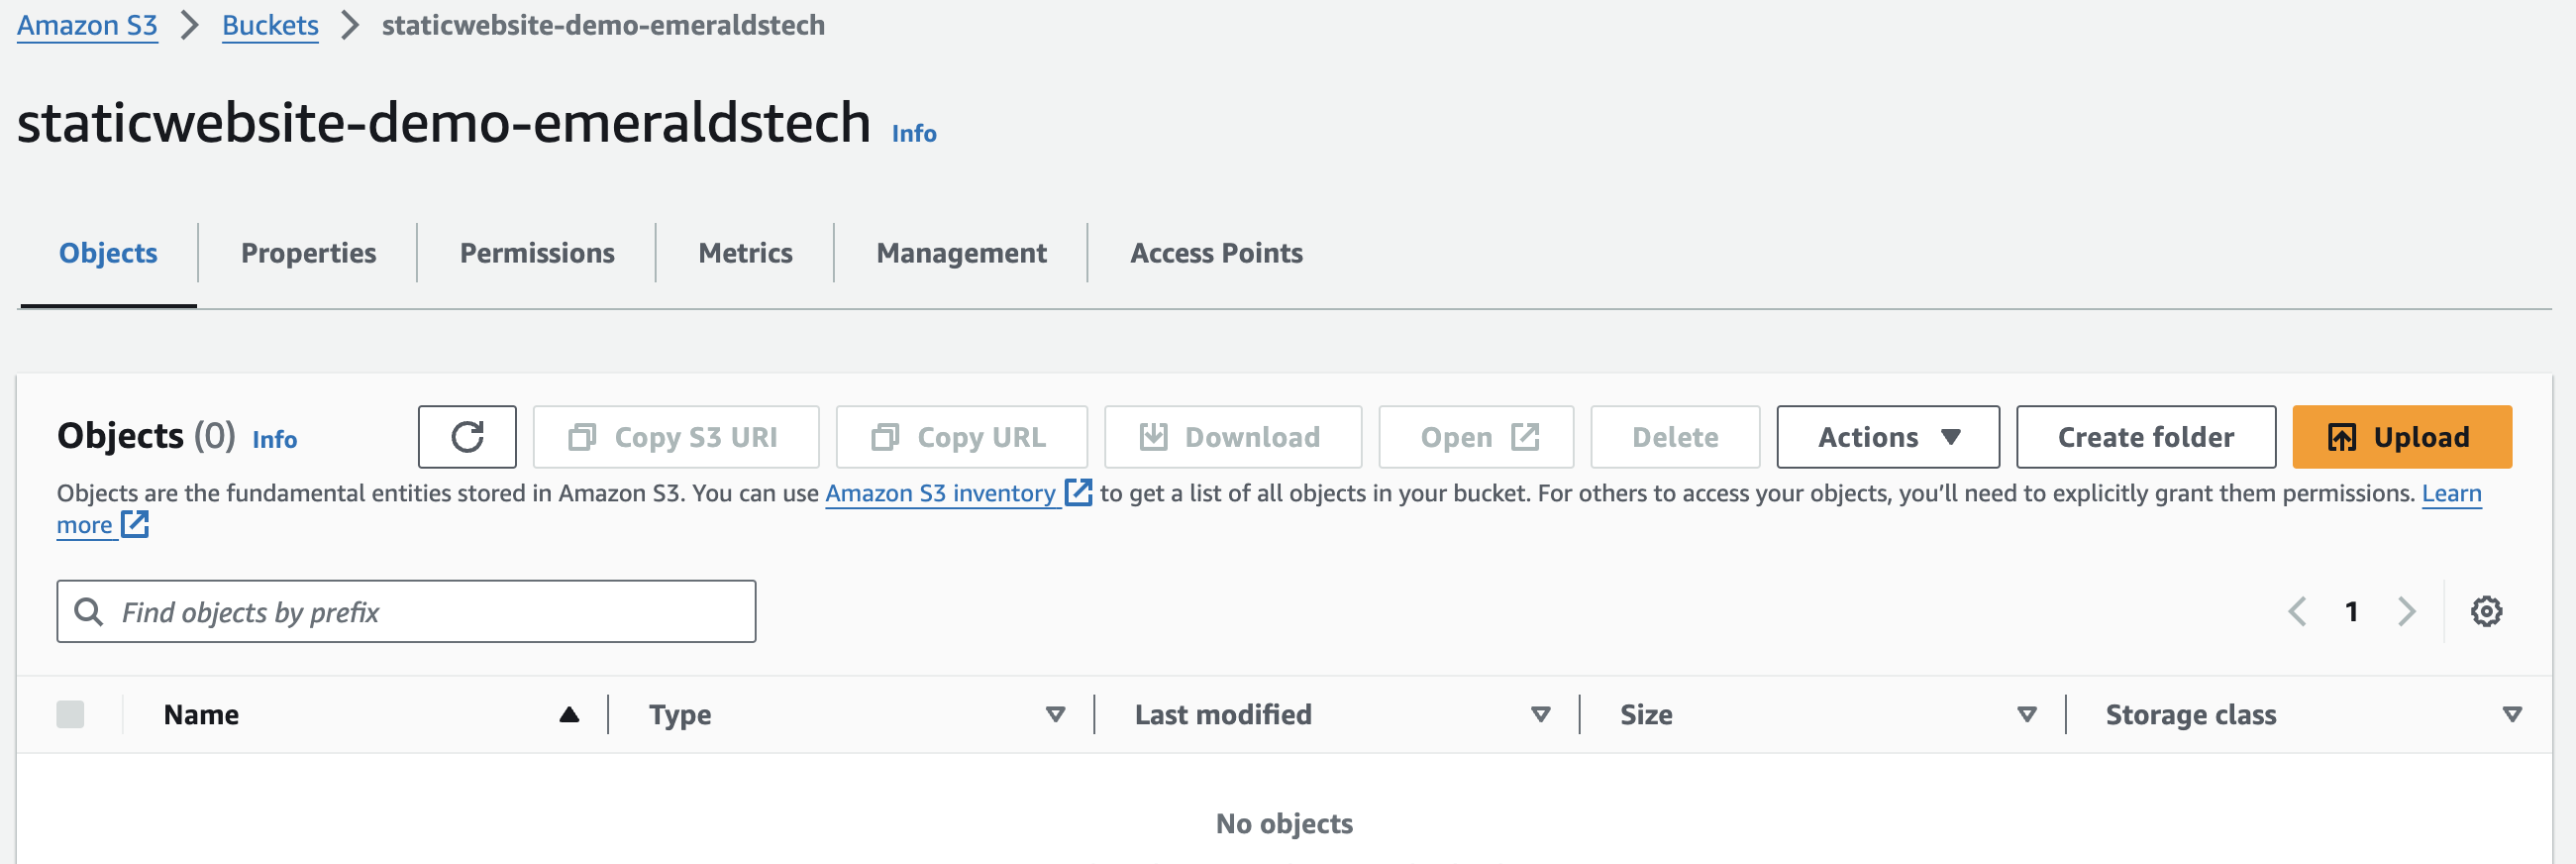
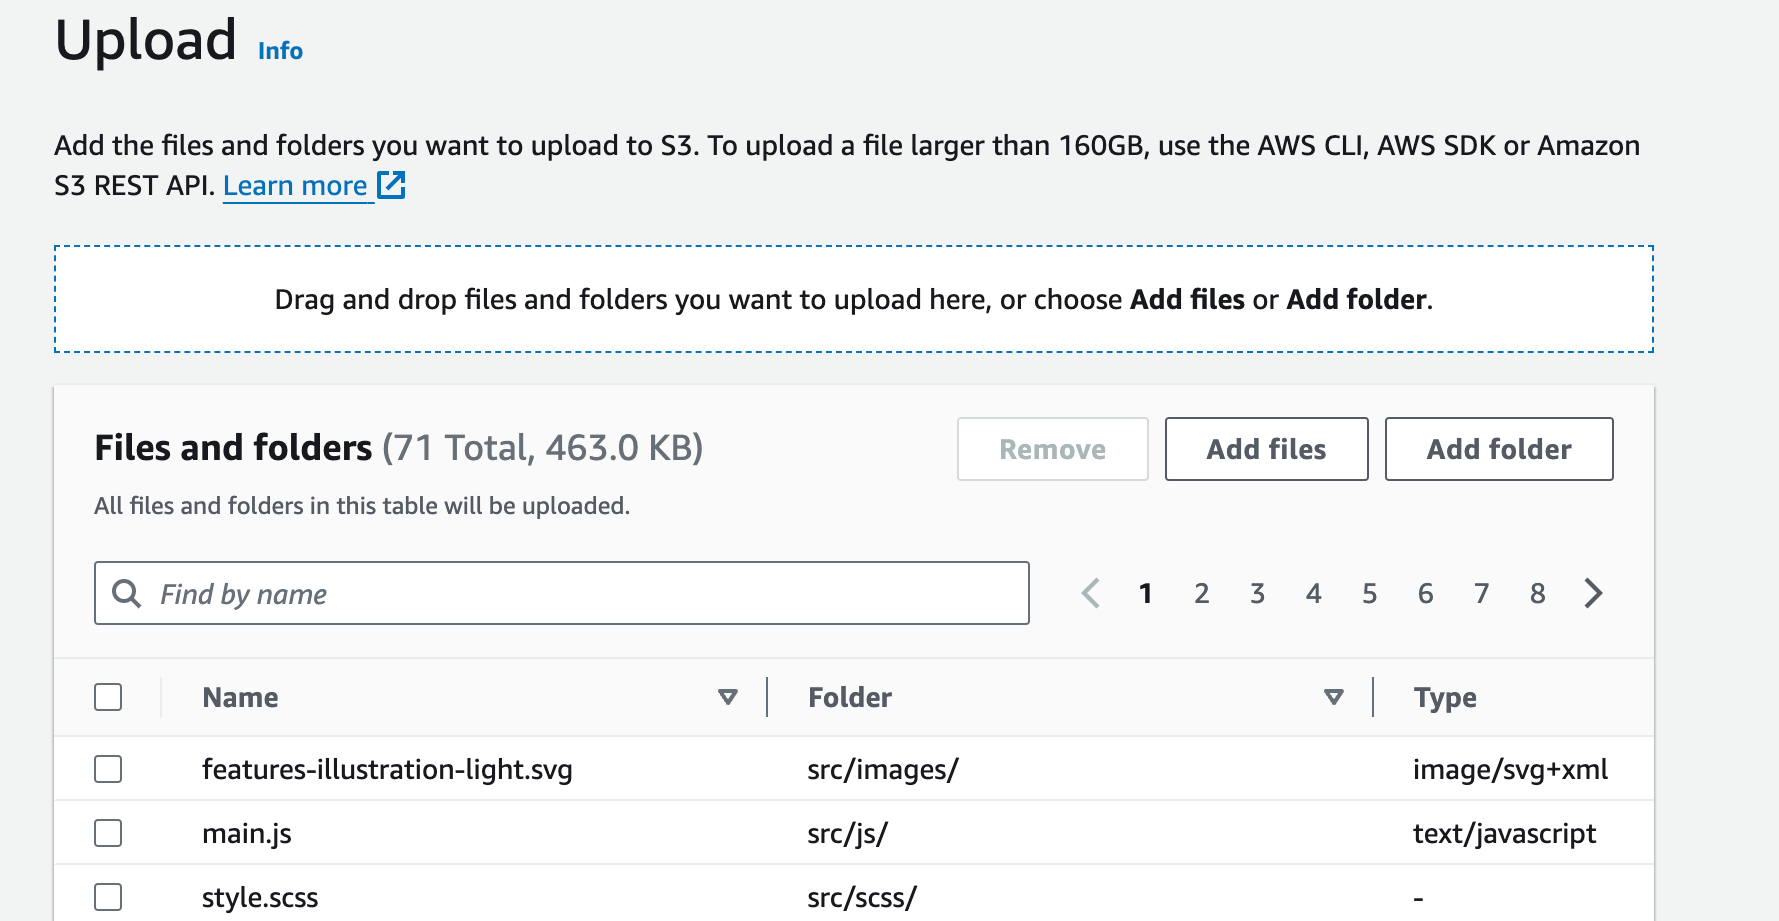
Upload Your Website Files: Drag and drop or use Upload button for uploadng all your website files (HTML, CSS, JavaScript, images) into the S3 bucket. It's like filling your locker with everything your website needs.
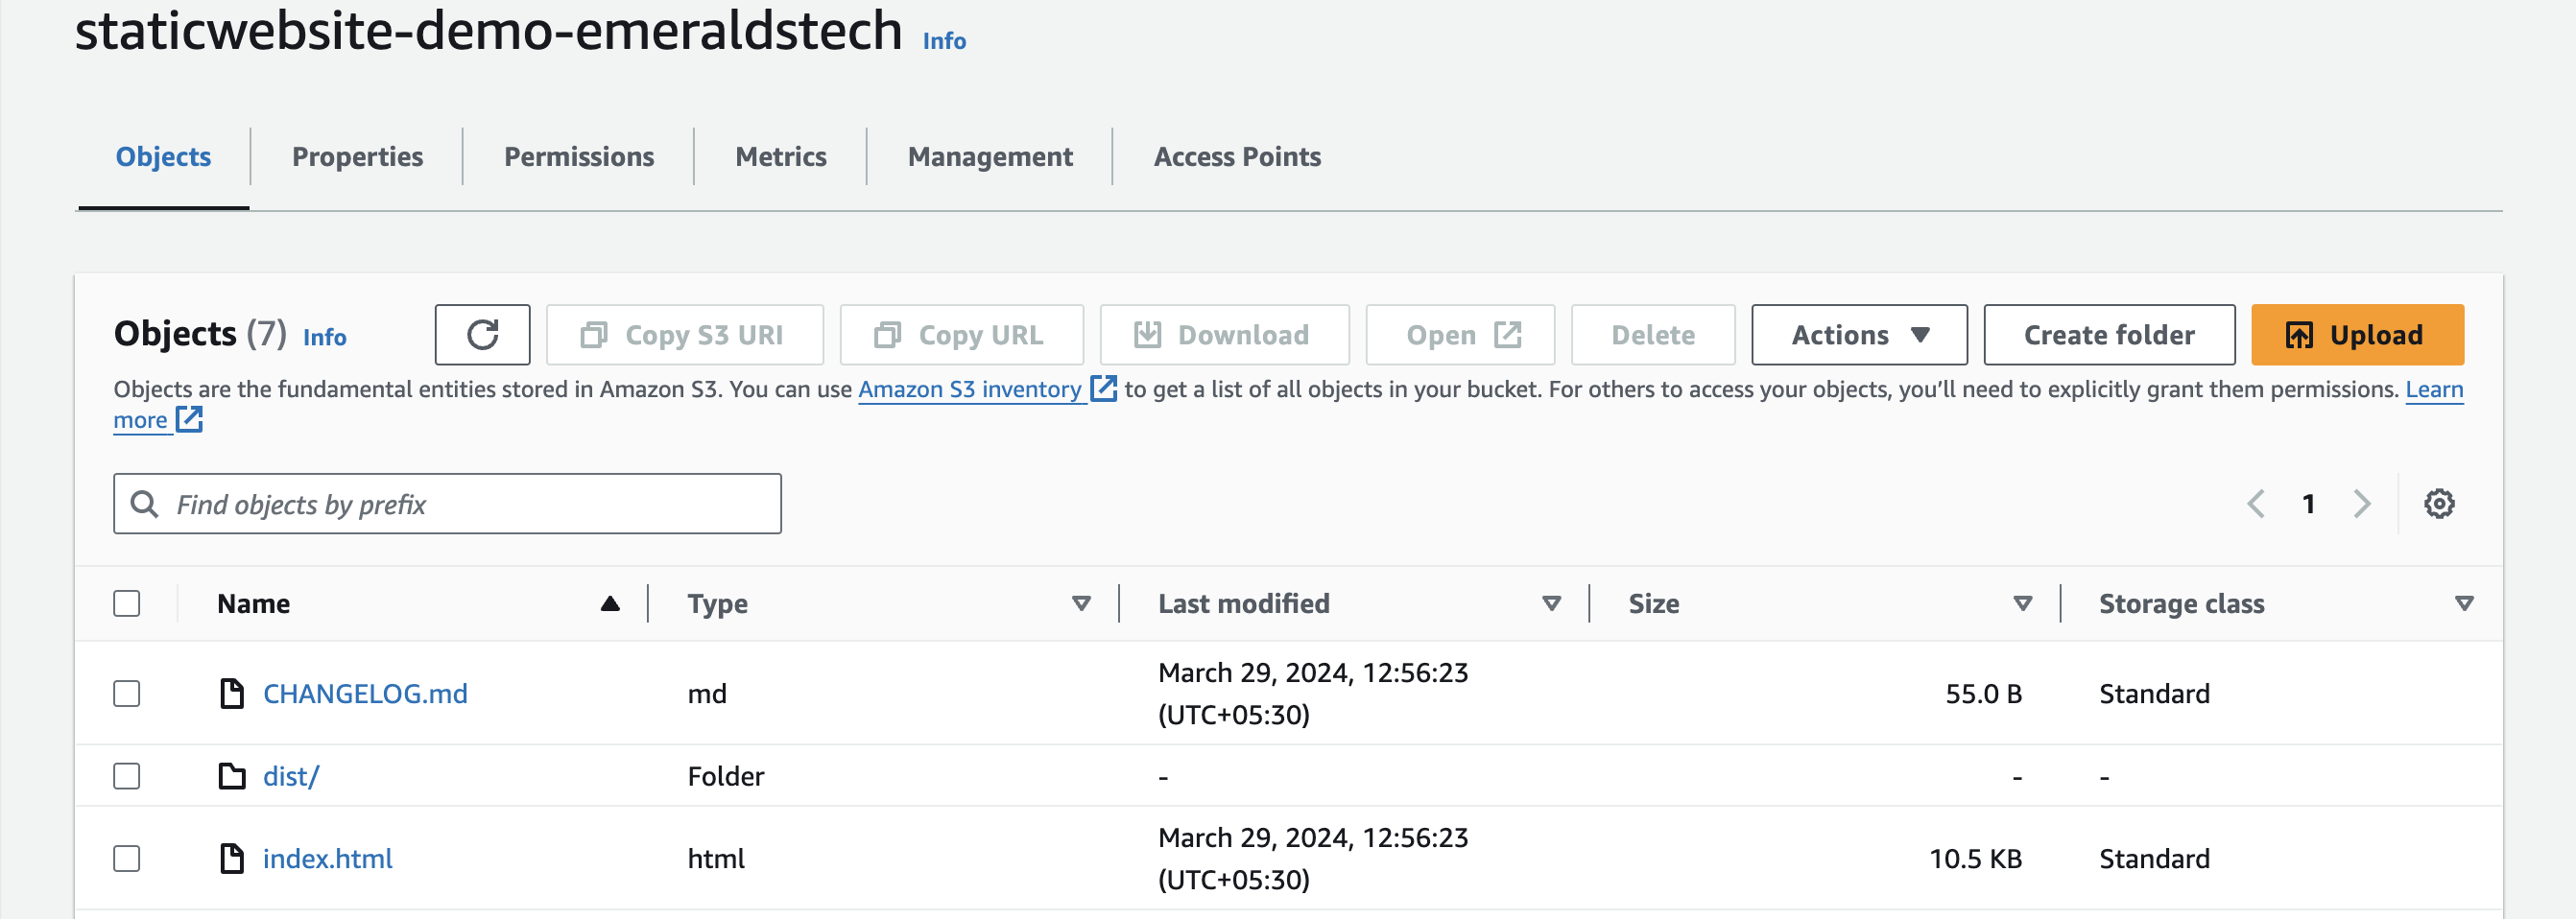
Successfully Uploaded static website files to S3 bucket.
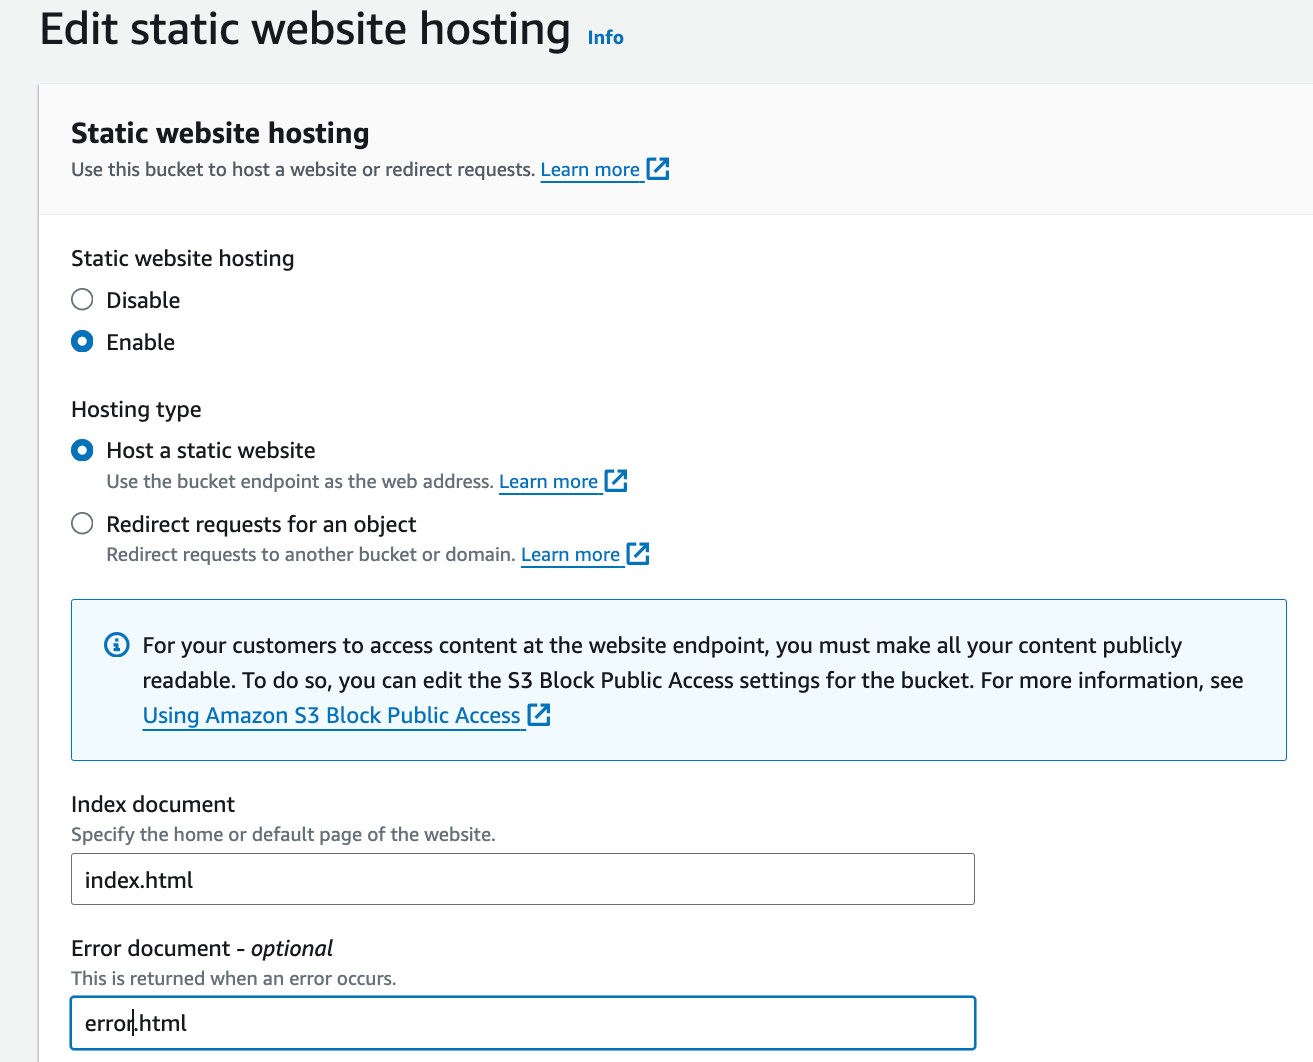
Enable Static Website Hosting: Within your S3 bucket click on Properties, look for the option to "Enable website hosting" at the Bottom of the Page. Click on Edit button and Enable Static Web Hosting. Tell S3 which file (usually "index.html" and error.html) should be displayed first when someone visits your website and click on Save Changes.

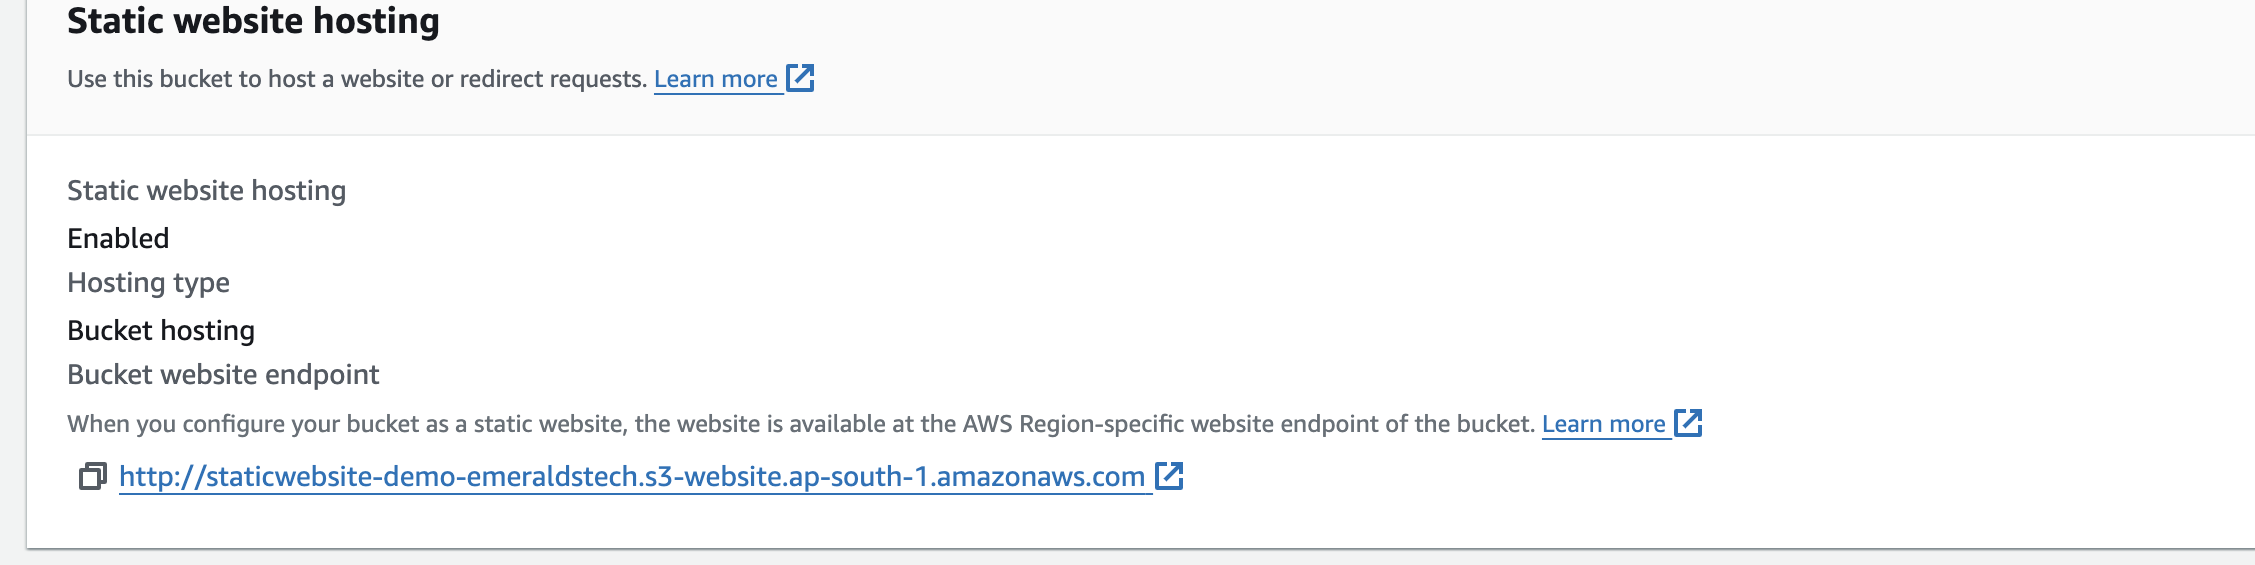
Once you saved you will now see an URL under static web hosting option like below. Click on it
Error 😄
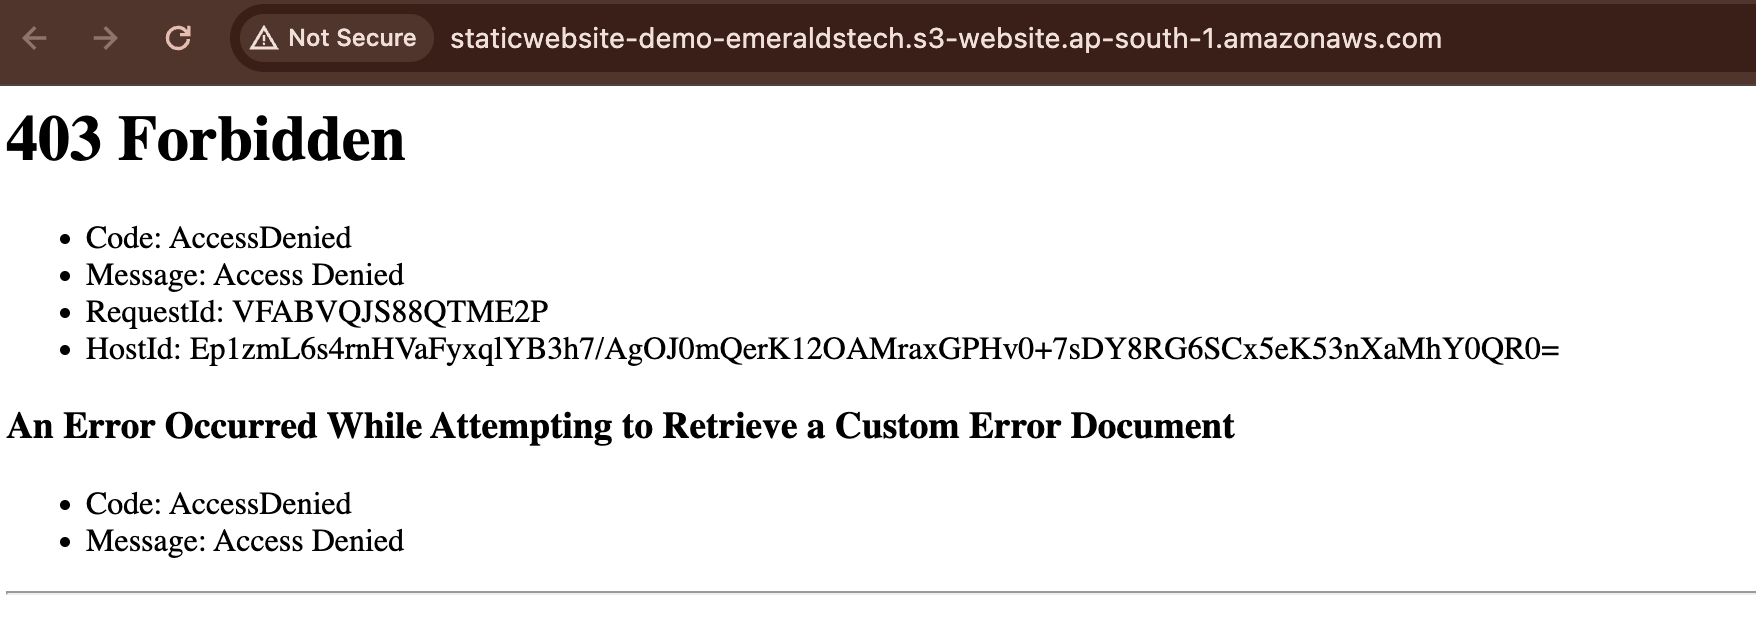
Don't worry we still need to few more configuration for our web hosting.Now click on Permissions tab at the top
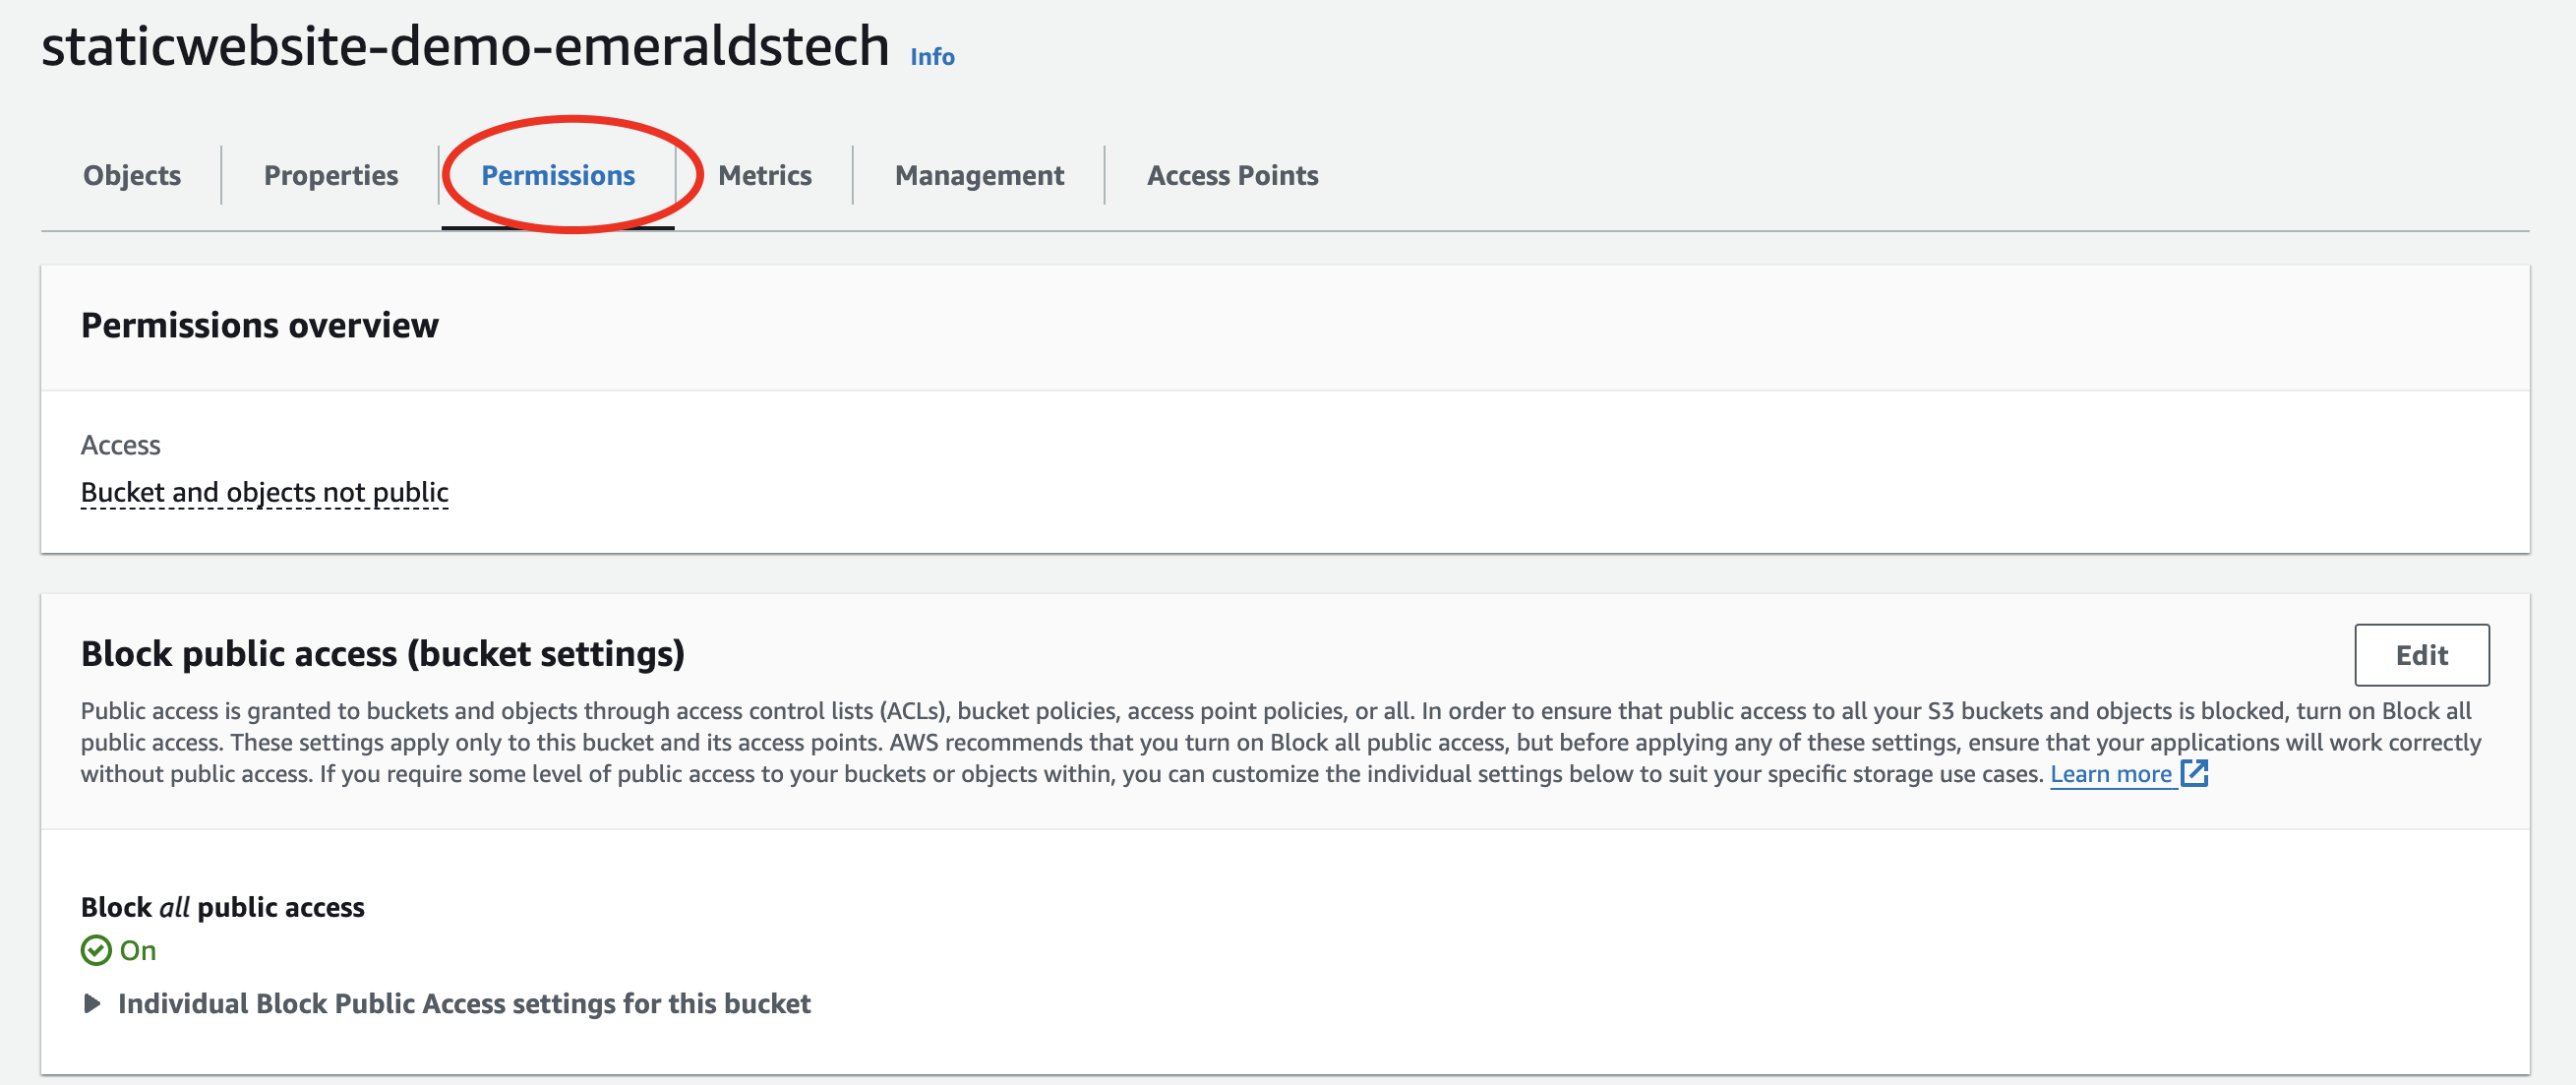
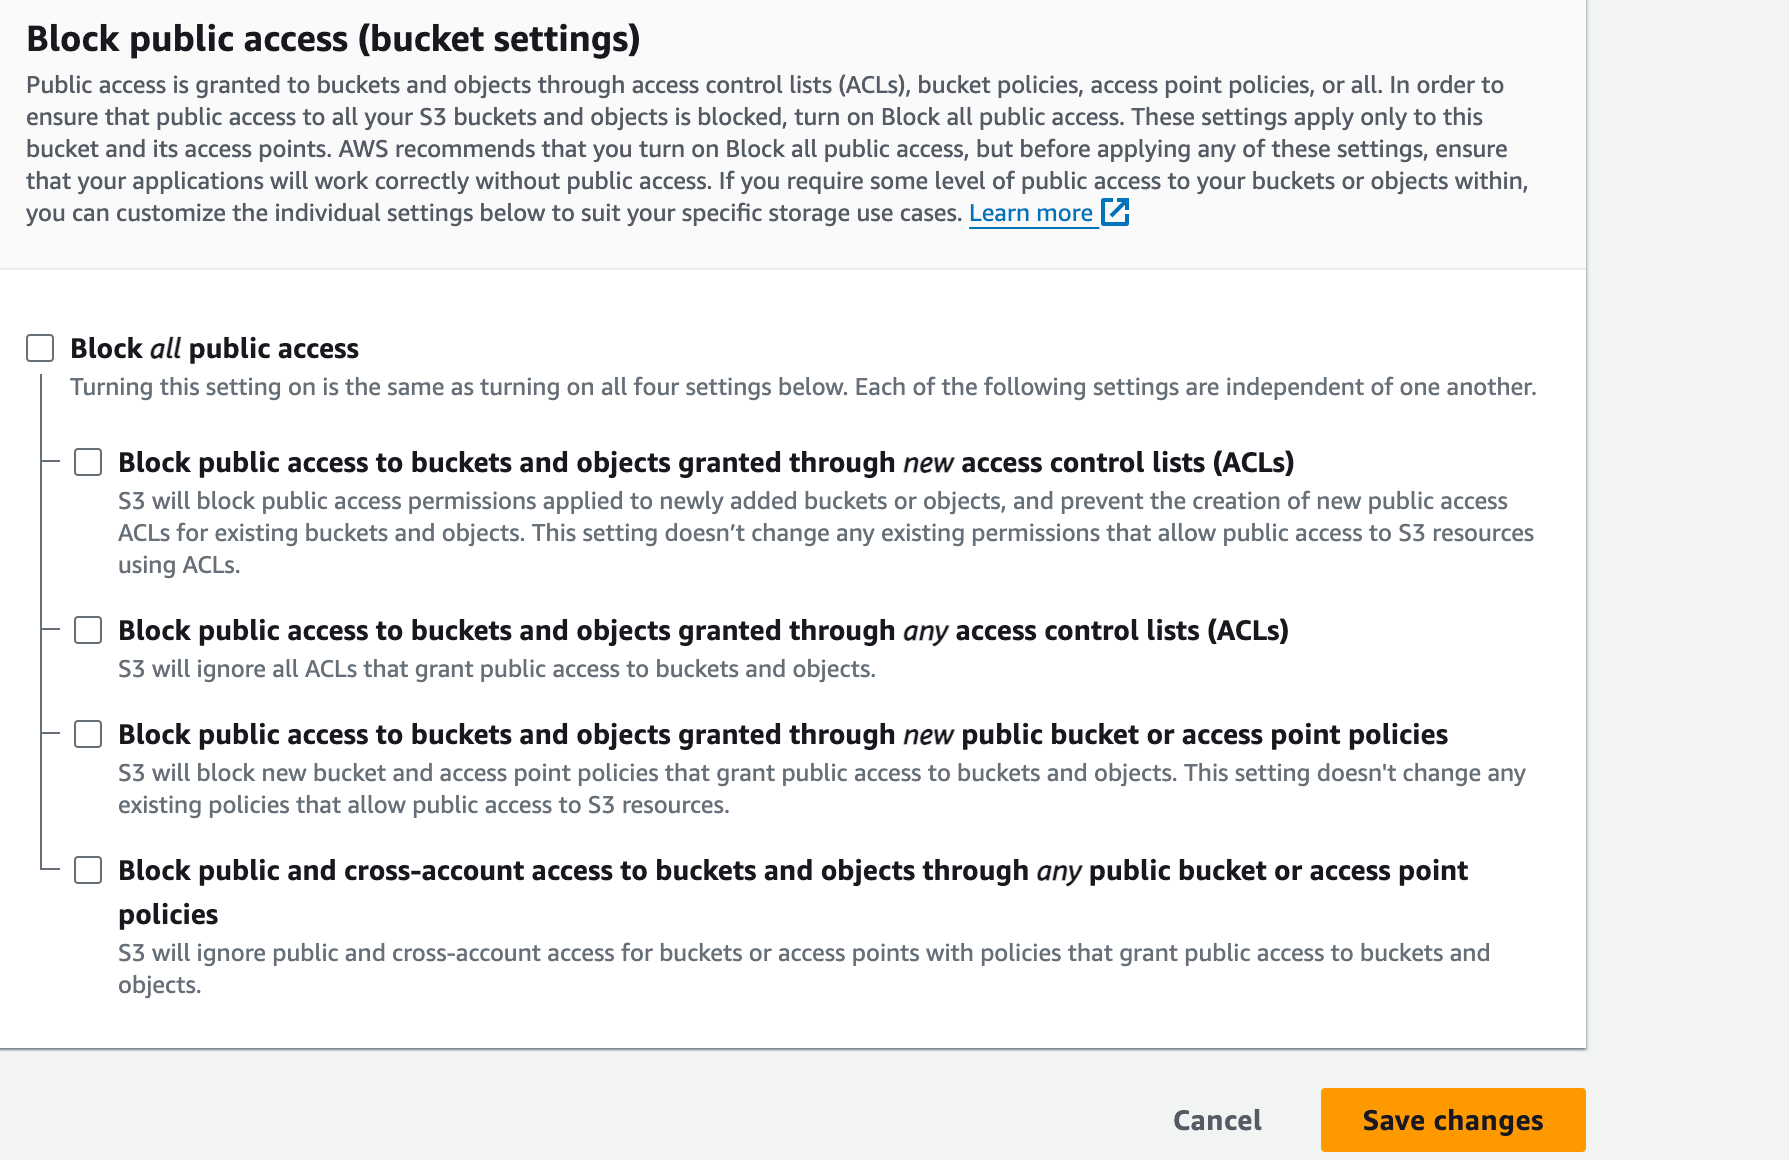
By default when you created S3 buckt public access will be disabled. Due to this we are facing above Forbidden error. Click on Block public access (bucket settings) Edit but and uncheck all the check boxes and save changes provide confirmation.
After allowing public access still we will face issue because access will be blocked by bucket policies. Yes each bucket have it's own policies where you can provide the access to objects in it.
Now let's create an Public read only bucket policy which will allow users to access our website.

Create S3 Bucket Policy: We can create using policy editor or directly json file. I will provide the policy below please copy paste in you policy editor.
{
"Version": "2012-10-17",
"Statement": [
{
"Sid": "StaticWebsite",
"Effect": "Allow",
"Principal": "",
"Action": "s3:GetObject",
"Resource": "arn:aws:s3:::staticwebsite-demo-emeraldstech/"
}
]
}
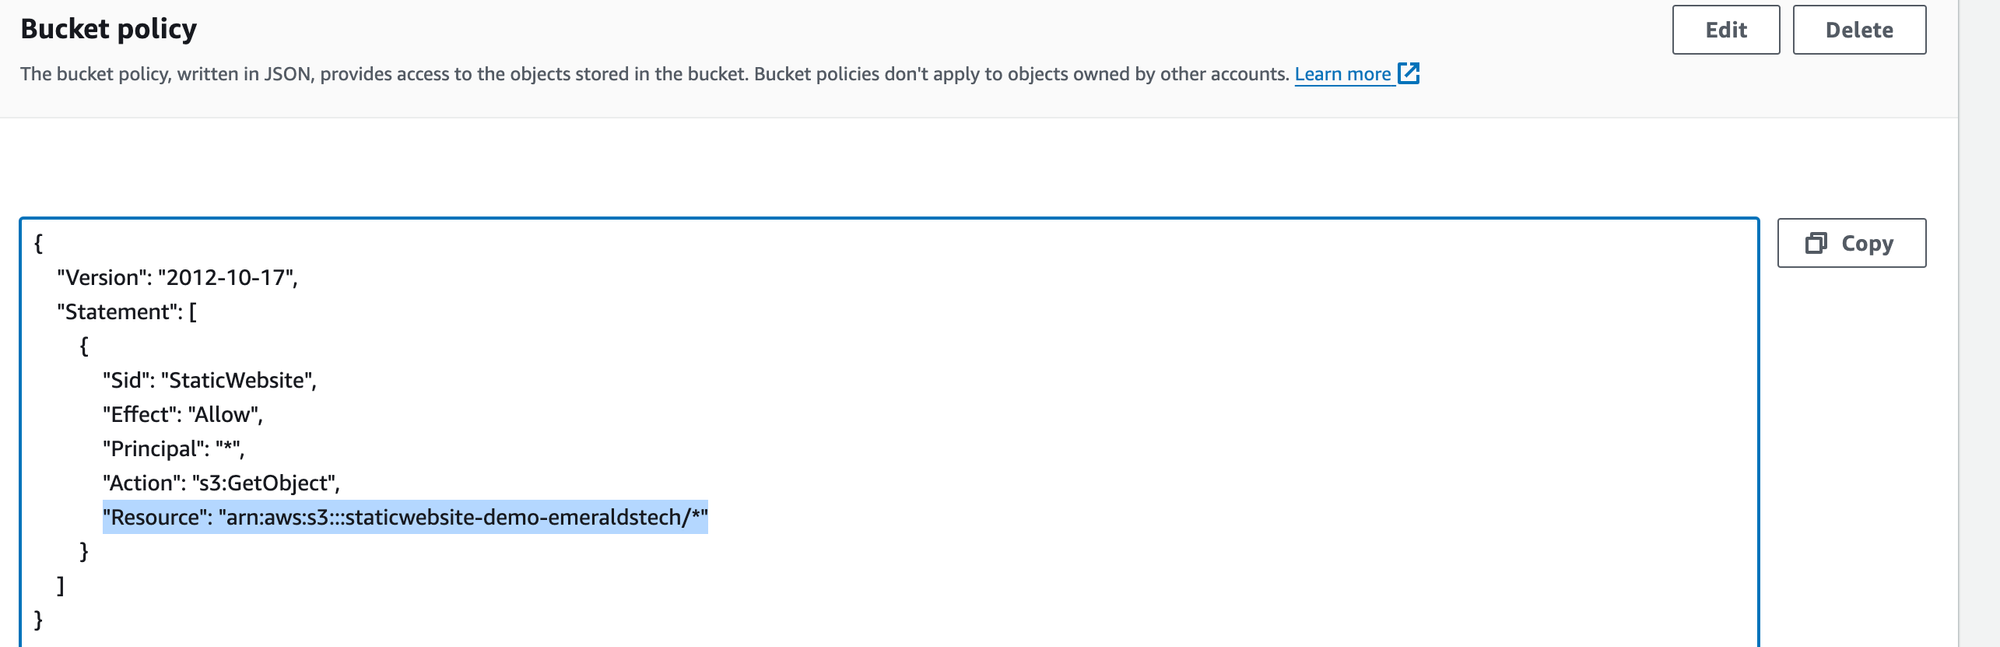
Note: Please Replace Bucket ARN with your own bucket ARN
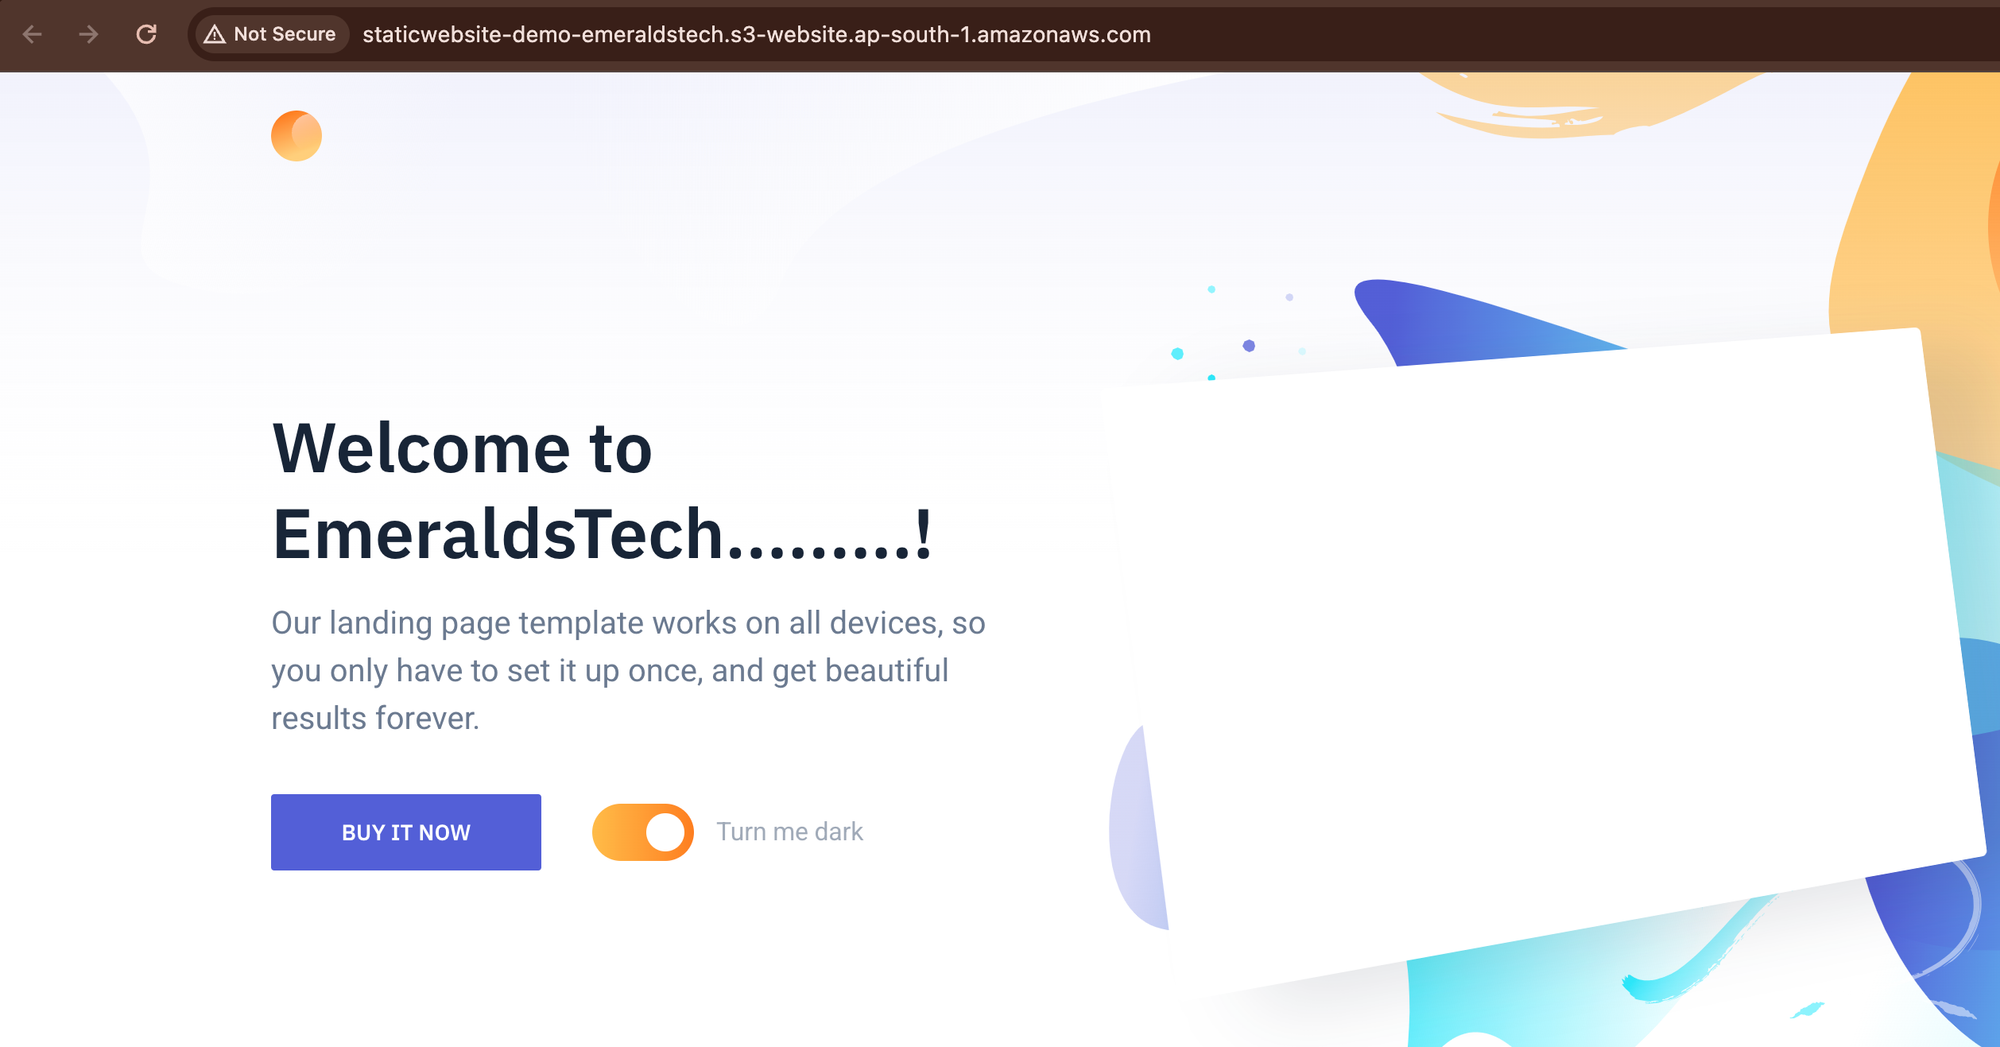
Now We all set for Static Web Hosting. Please go ahead and refresh the URL...
Congratulations! We've successfully hosted Website on S3.
Please follow this link for Cloudfront Creation and Configuration for Faster Website with Low Latency and custom DNS name 😊. Click On Below link for AWS Cloudfront hosting with S3.

![[Explained] How to Add Custom Domain to AWS "CloudFront" with SSL Enabled](/content/images/size/w300/2024/03/_72e1e43b-2175-4074-9b5e-d9b8dfbd1f46.jpeg)