[Explained] How to Add Custom Domain to AWS "CloudFront" with SSL Enabled

![[Explained] How to Add Custom Domain to AWS "CloudFront" with SSL Enabled](/content/images/size/w600/2024/03/_72e1e43b-2175-4074-9b5e-d9b8dfbd1f46.jpeg)
Your static website is up and running on AWS S3, and content is delivered blazingly fast by CloudFront – fantastic! But wouldn't it be great to have a custom domain name that's easy to remember and brand your website professionally? This blog post will guide you through the process of adding a custom domain to your CloudFront distribution and enabling SSL for a secure connection, all in a few simple steps!
Why a Custom Domain?
- Branding: A custom domain (e.g., "[invalid URL removed]") strengthens your brand identity and makes your website more memorable.
- Professionalism: It conveys a sense of professionalism and establishes trust with your visitors.
- User Experience: Custom domains are easier to type and remember, enhancing user experience.
Why Enable SSL?
- Security: SSL encrypts communication between your website and visitors' browsers, protecting sensitive data exchange (like login details).
- SEO Benefits: Search engines often favor websites with SSL certificates, potentially boosting your website's ranking.
- Trustworthiness: An SSL certificate assures visitors that your website is secure, fostering trust and confidence.
Adding a Custom Domain and Enabling SSL with CloudFront:
Prerequisites:
- An existing AWS account with S3 bucket (website content) and CloudFront distribution.
- A registered domain name (you can purchase one from domain registrars like GoDaddy or Namecheap). In my case, I have a Route53 Hosted Zone for my domain. If you have your domain on any domain registrars no problem please follow the same process😄.
- An SSL certificate for your custom domain (you can obtain a free SSL certificate from AWS Certificate Manager or purchase one from a trusted provider).
Obtain a free SSL certificate from AWS Certificate Manager:
Before adding a custom domain to CloudFront let's obtain an SSL certificate later we can add it while updating the custom domain.
Within the AWS Management Console, navigate to Certificate Manager and select.
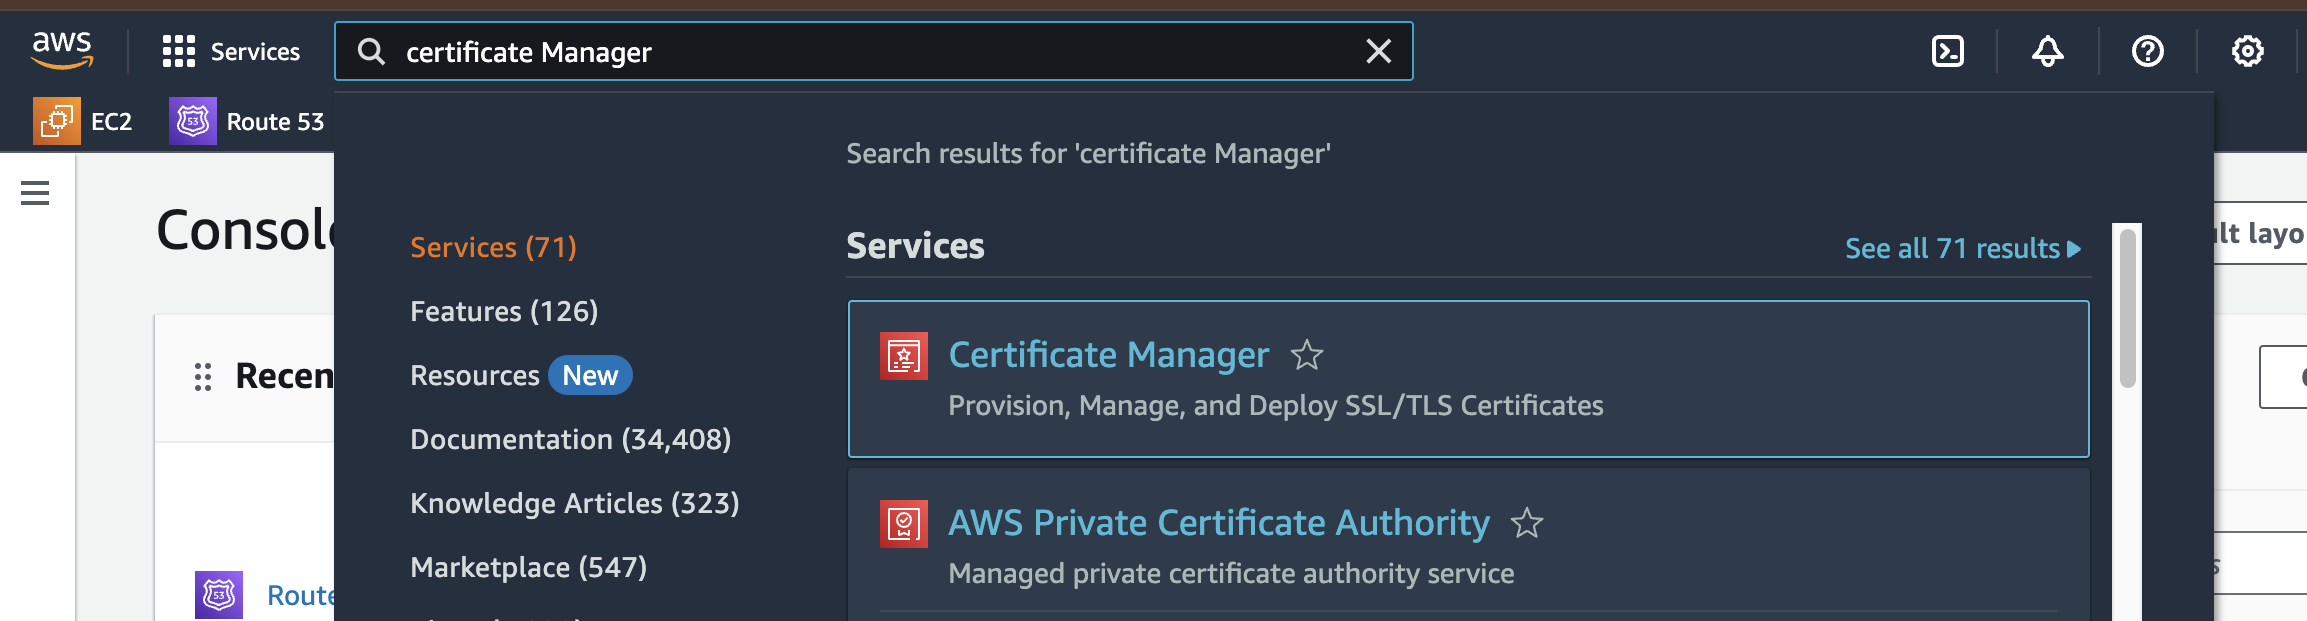
Click on Request Certificate to obtain a new SSL Certificate.
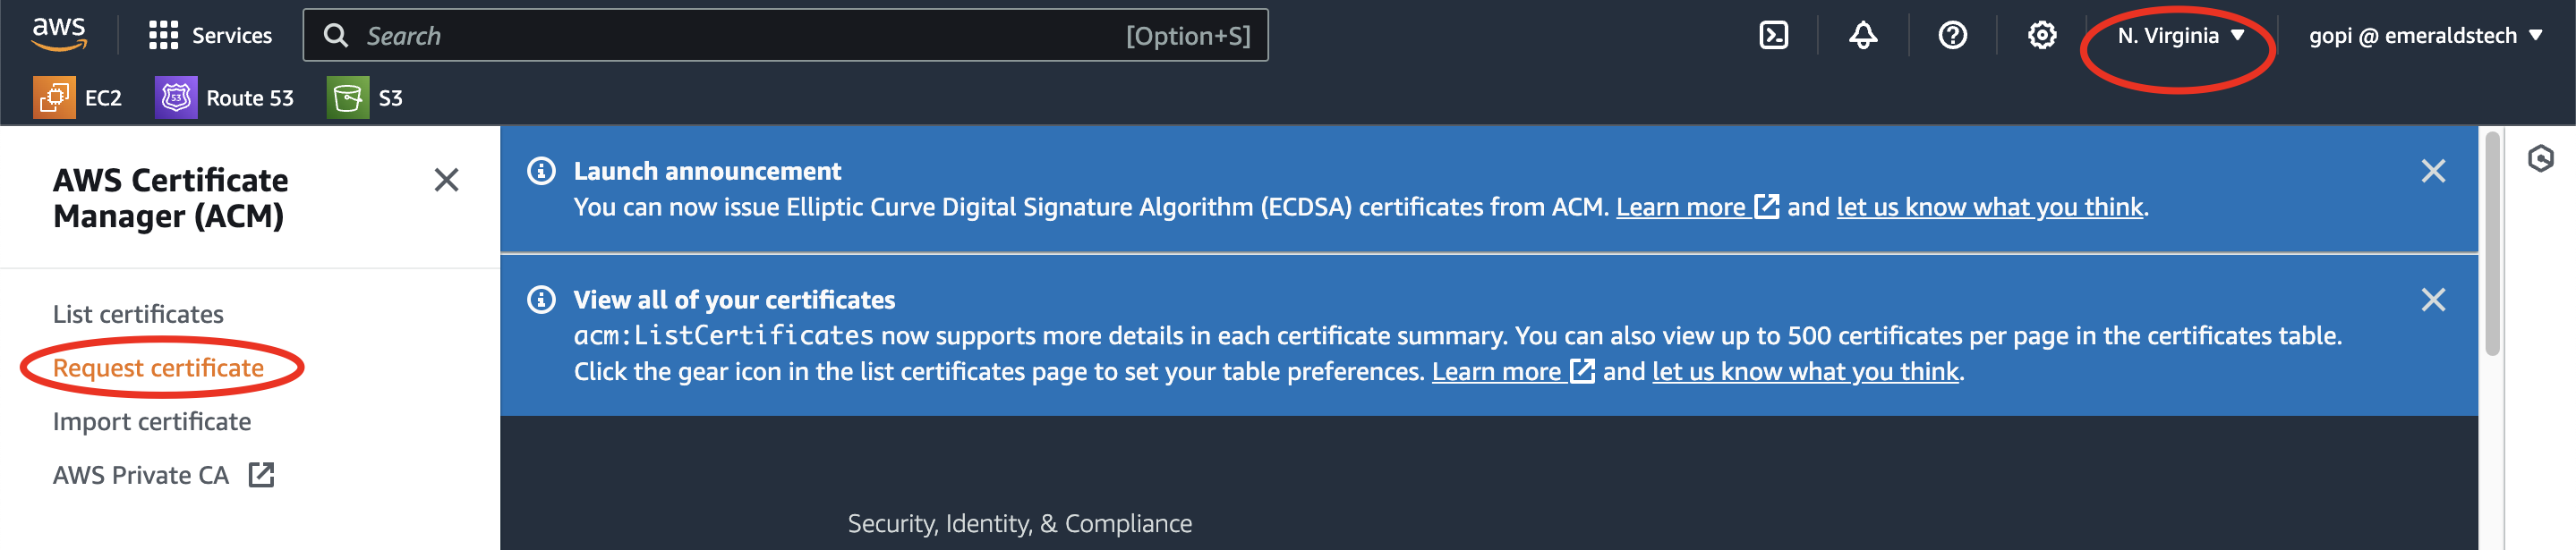
Note: Make sure you are creating an SSL certificate on Region=us-east-1
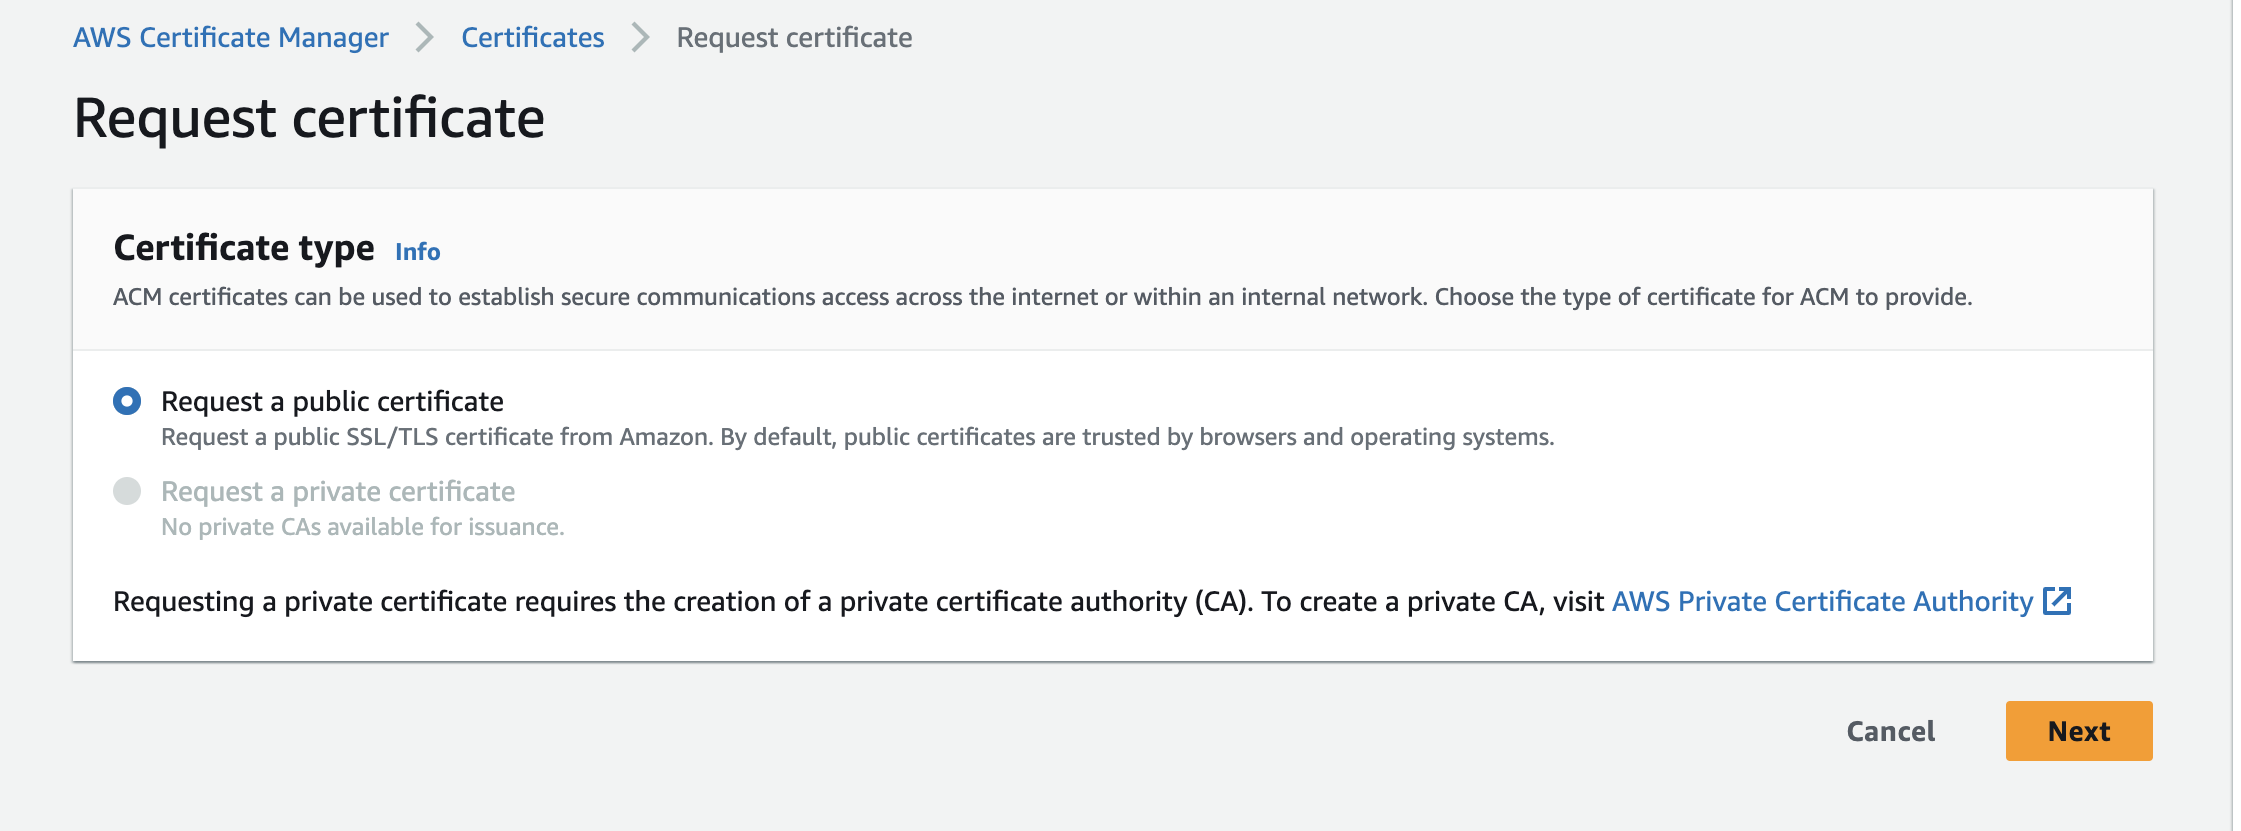
Now select the Request a public certificate option and click on Next
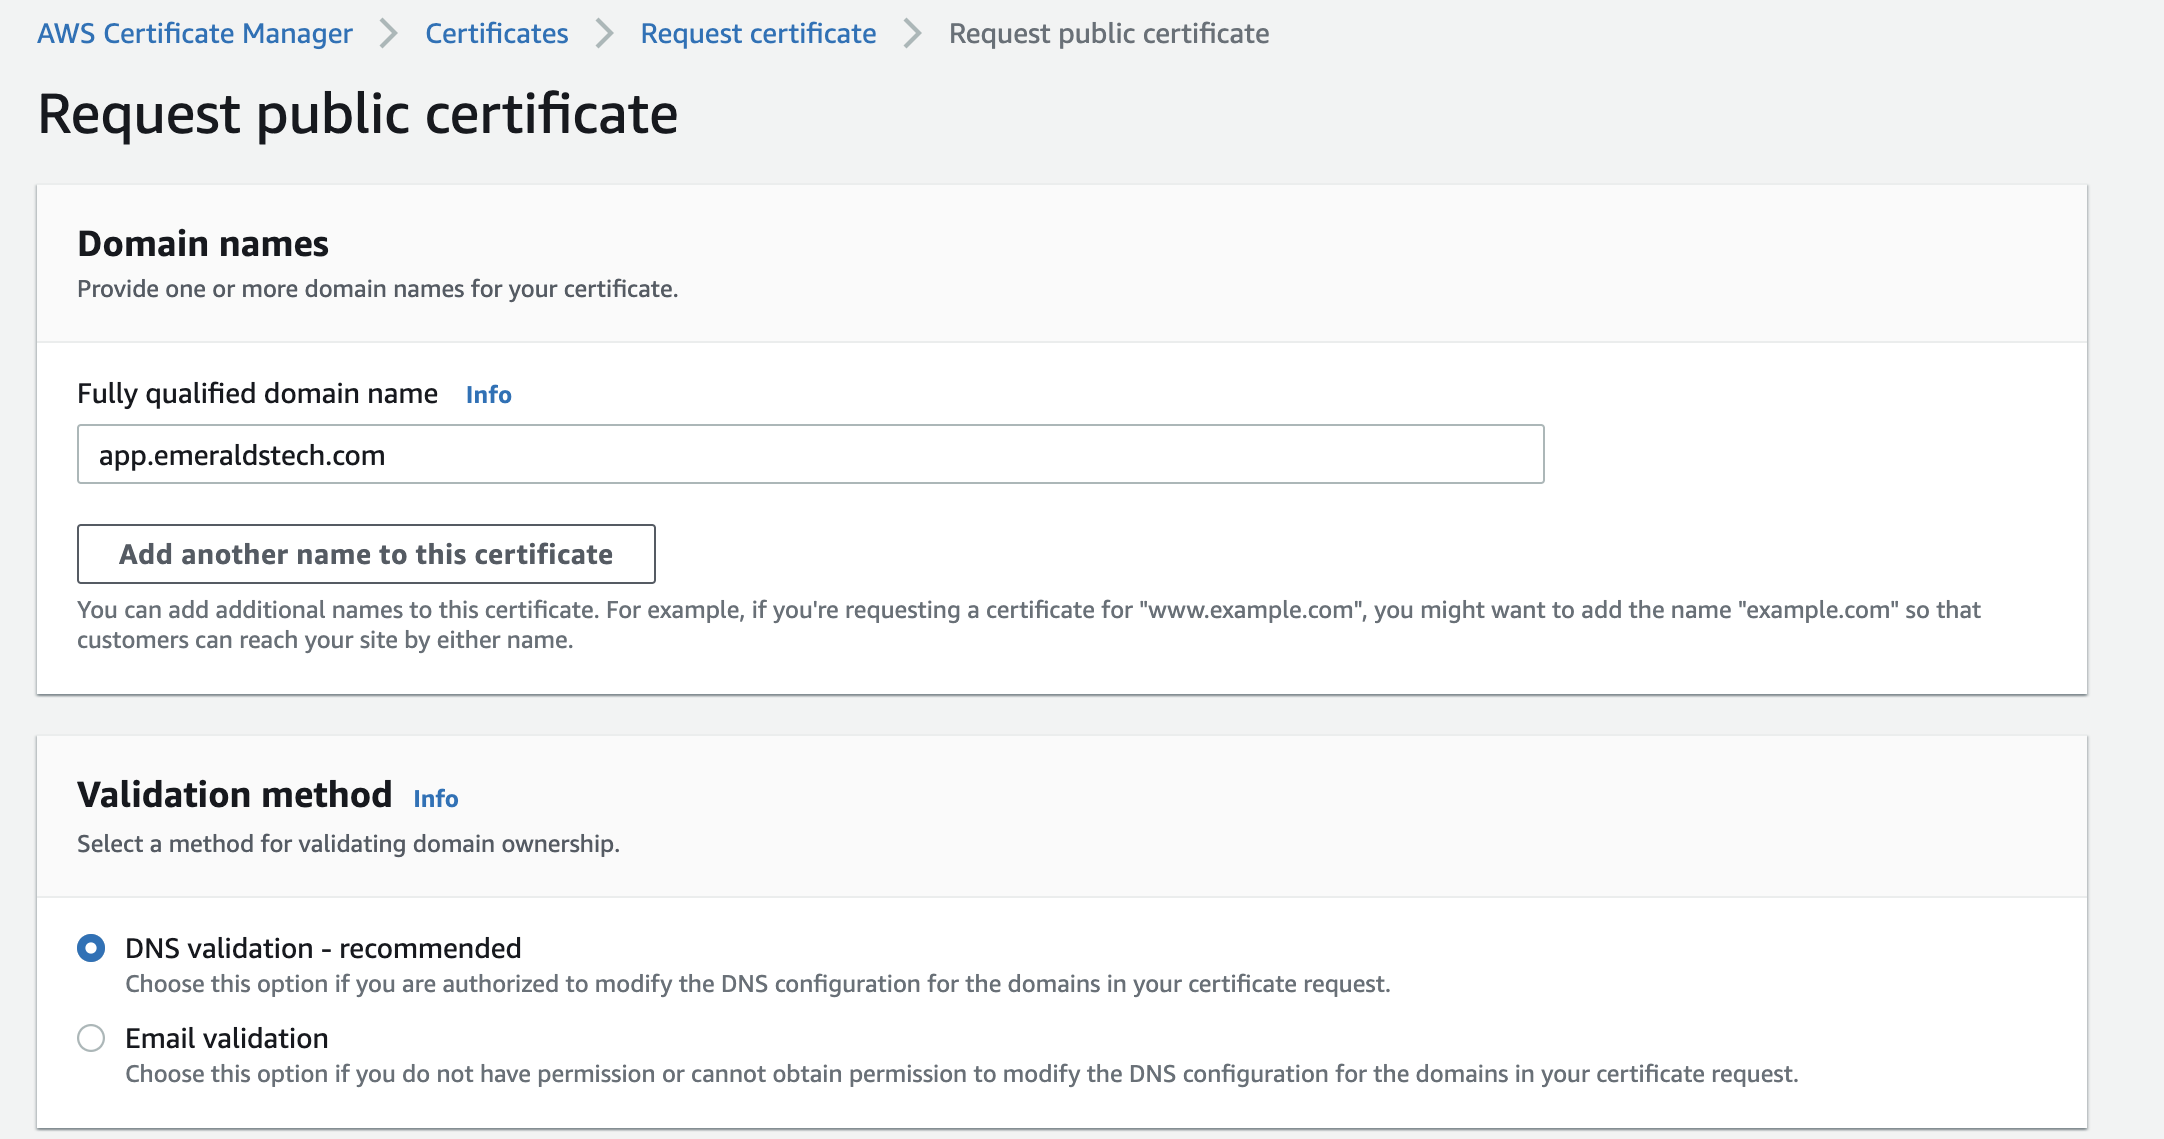
Now Please enter you Fully qualified domain name. In my case, I'm using the domain name app.emeraldstech.com the Validation method is DNS validation - recommended
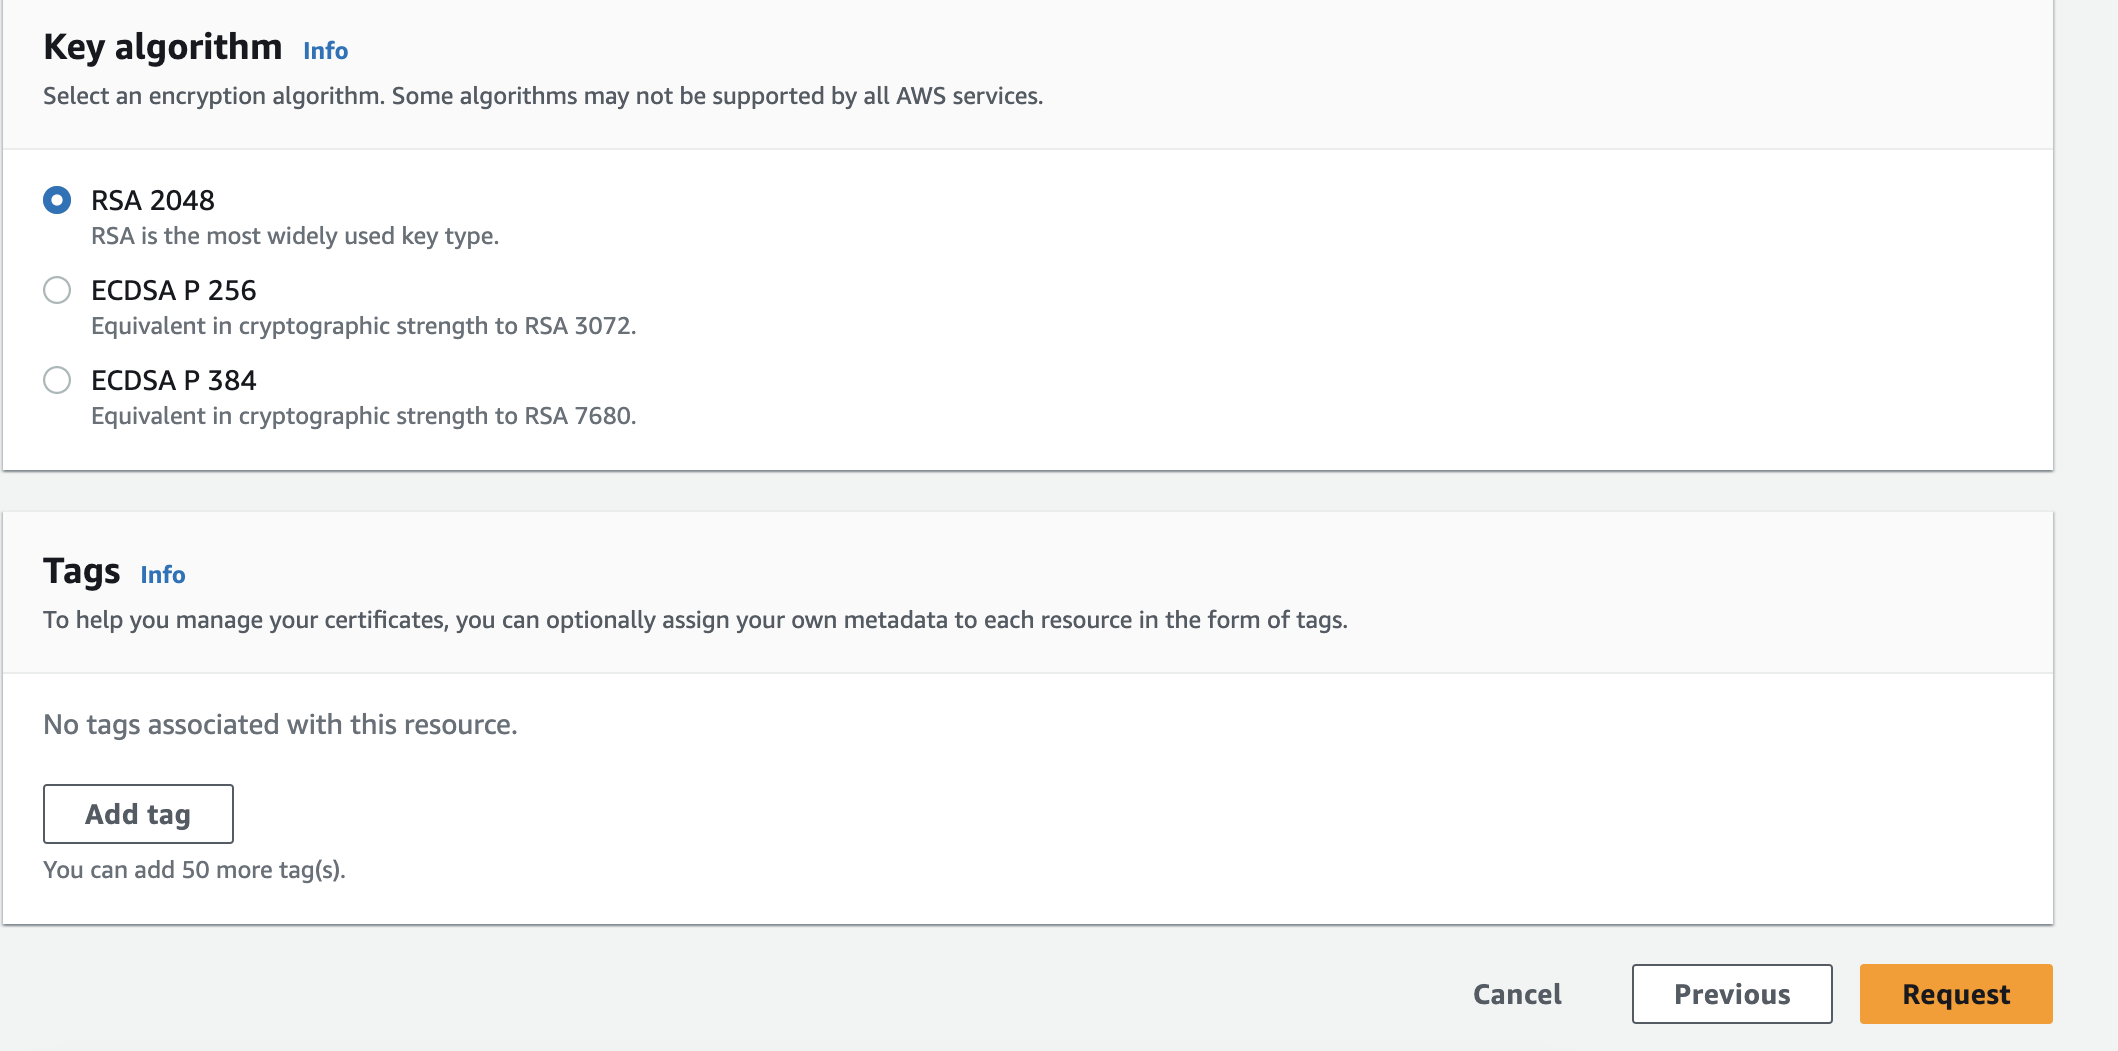
Keep the Default Key algorithm and click on Request
Now Certificate has been created but the status is Pending for Verification
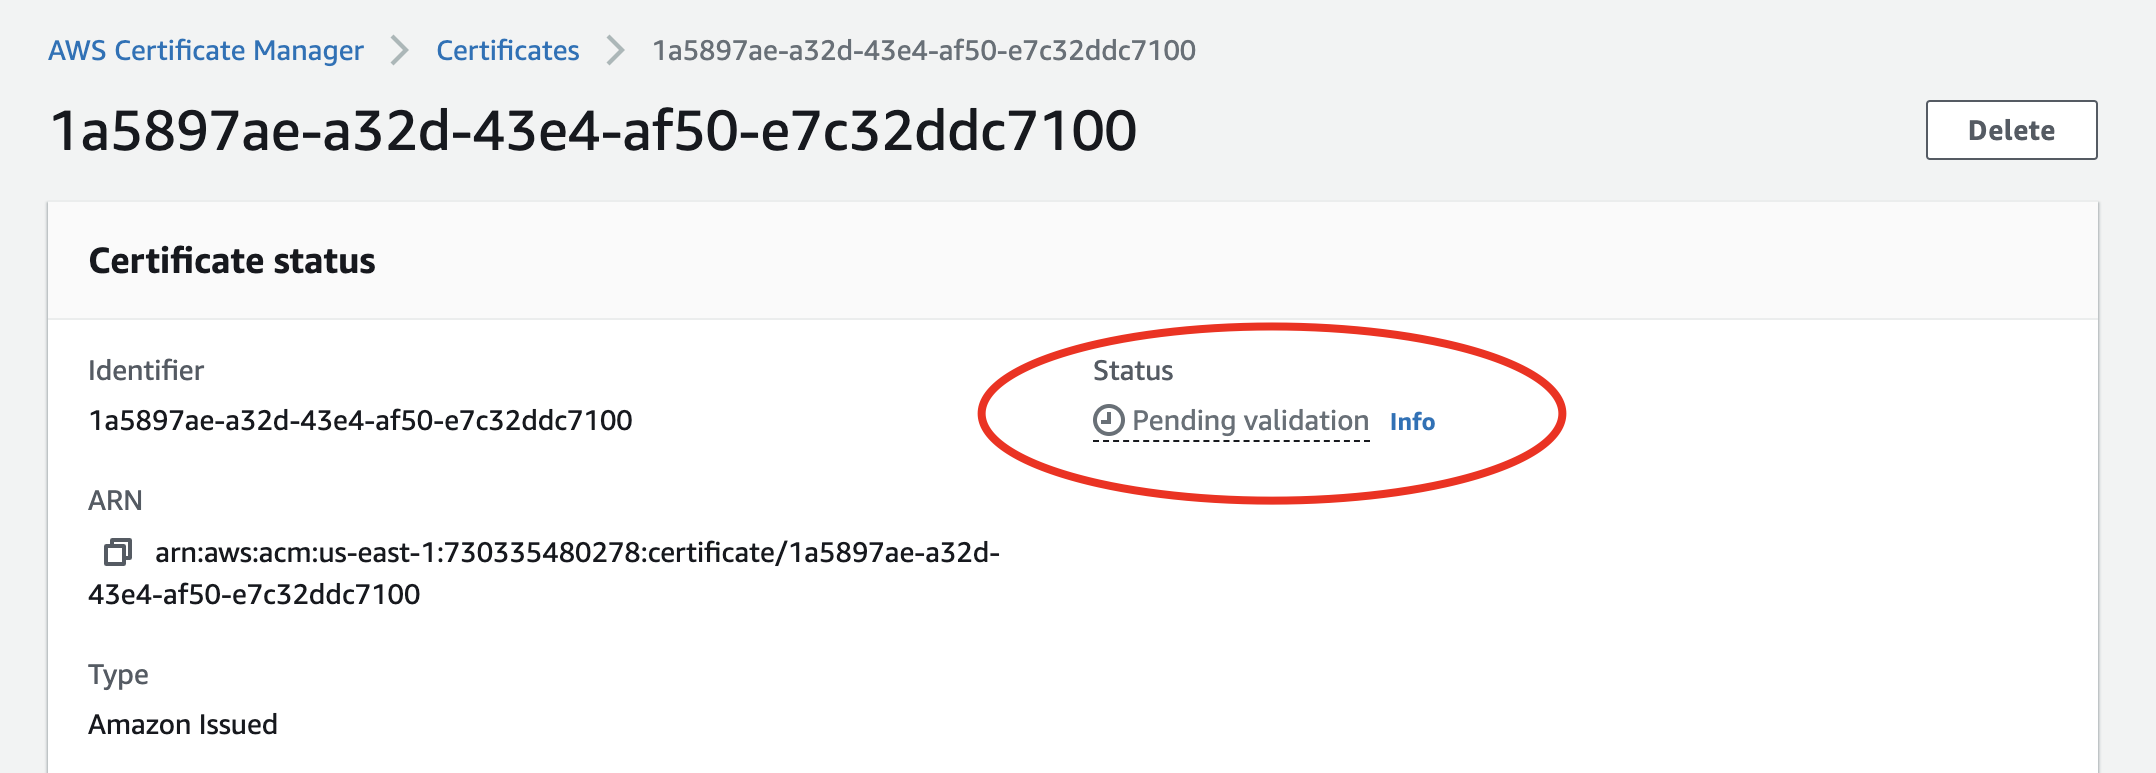
For Certificate verification CNAME name and CNAME value Records need to be added in the domain where it's hosted.
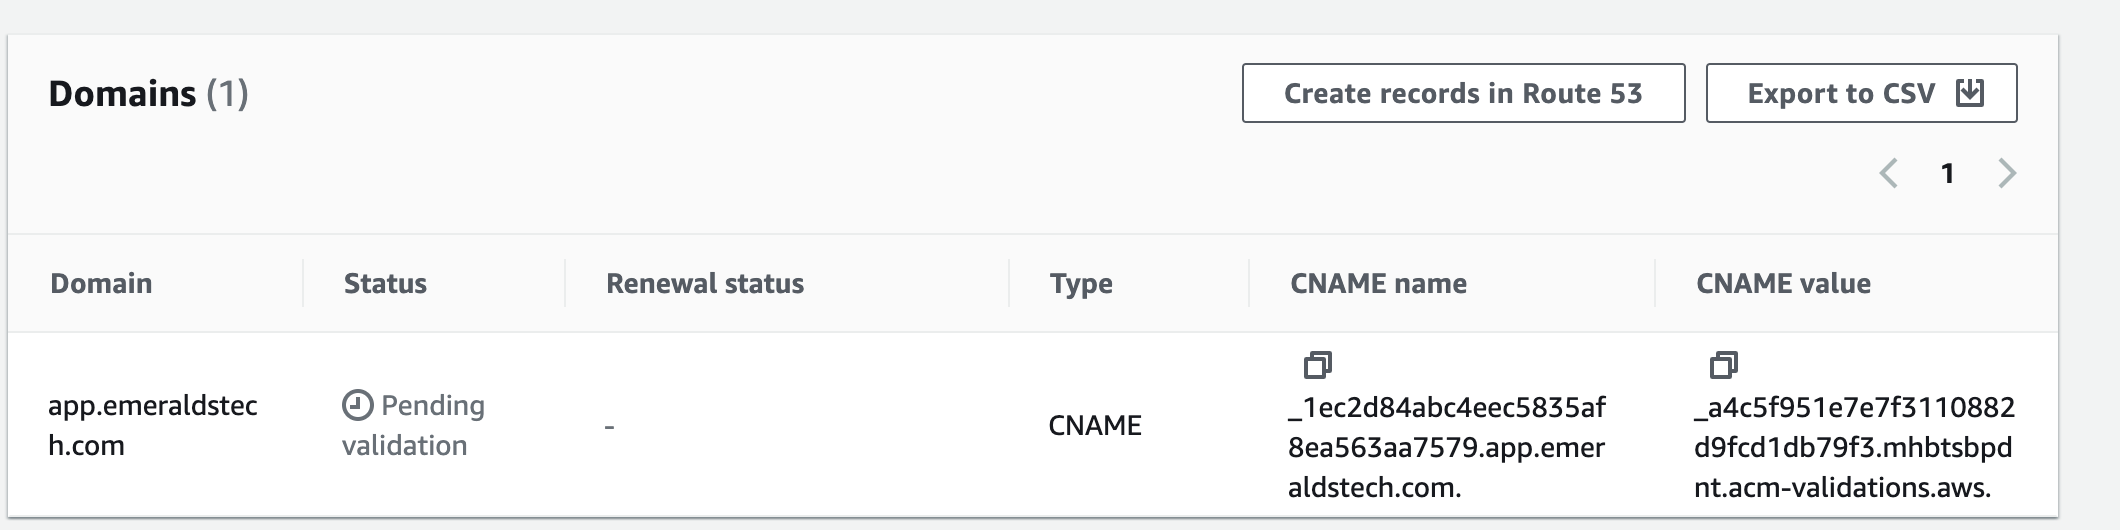
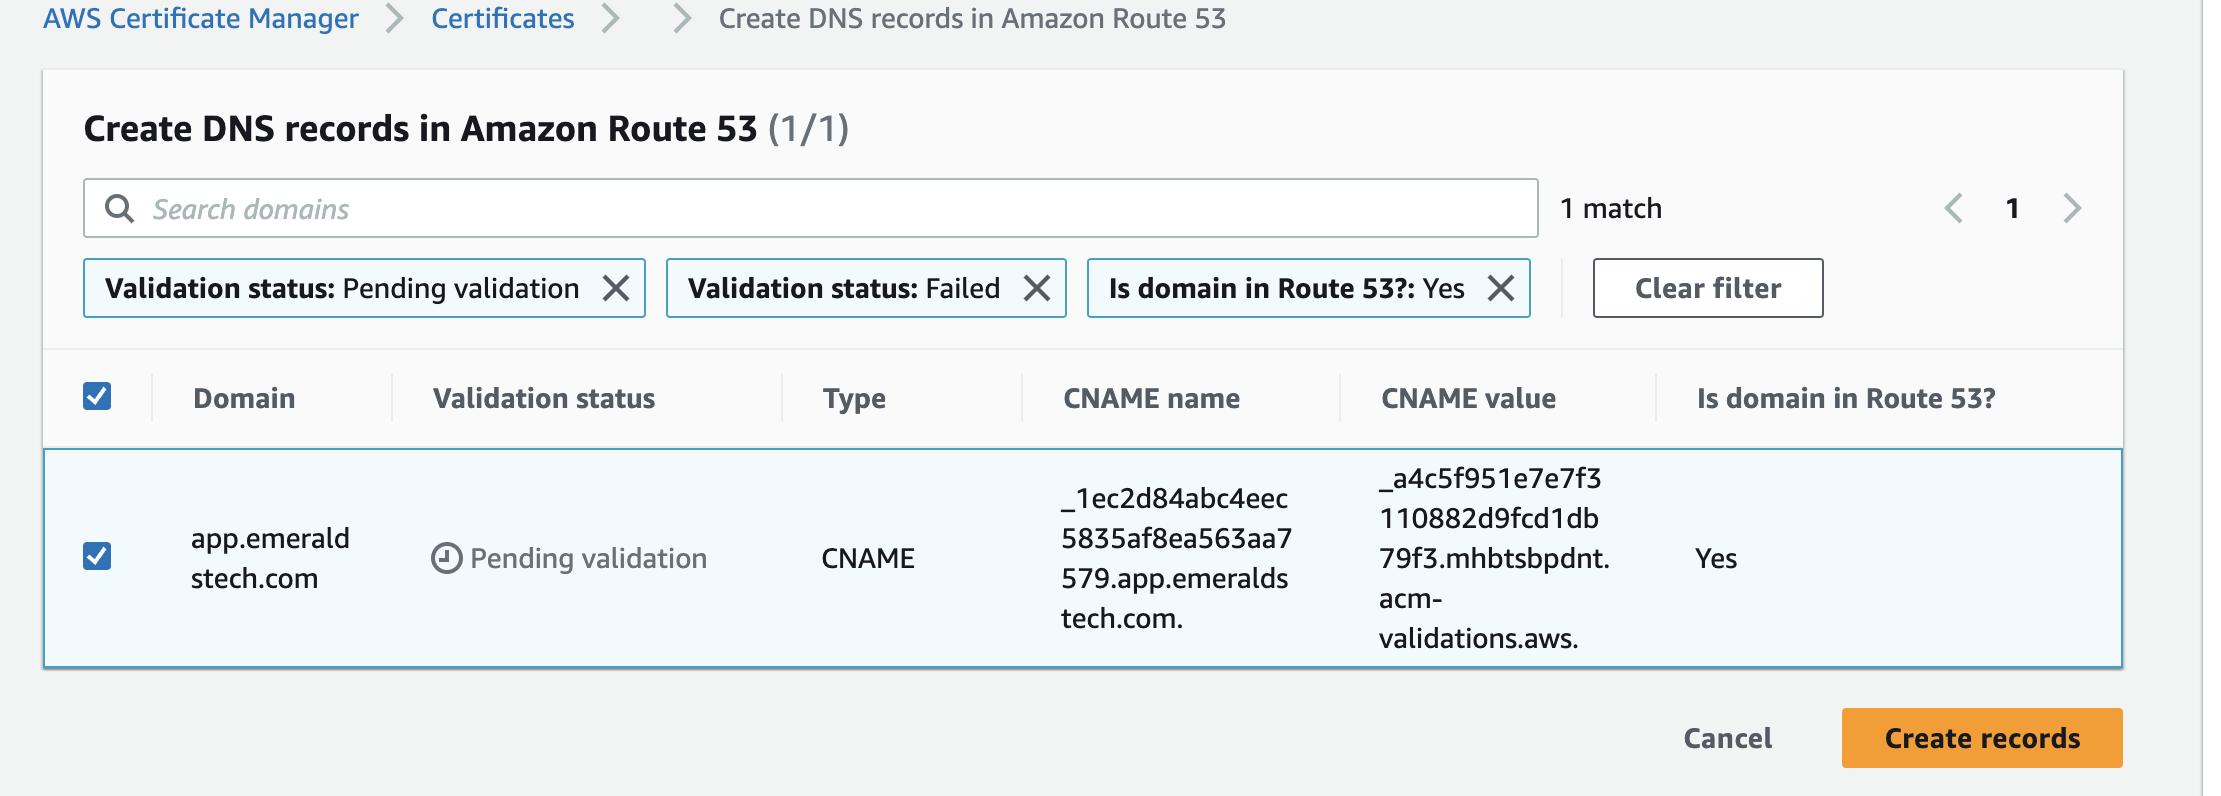
In my case my domain I have my domain in Route53. I will click on Create records in Route53 which will create records on my hosted zone. After Adding wait for some time validation will be completed.
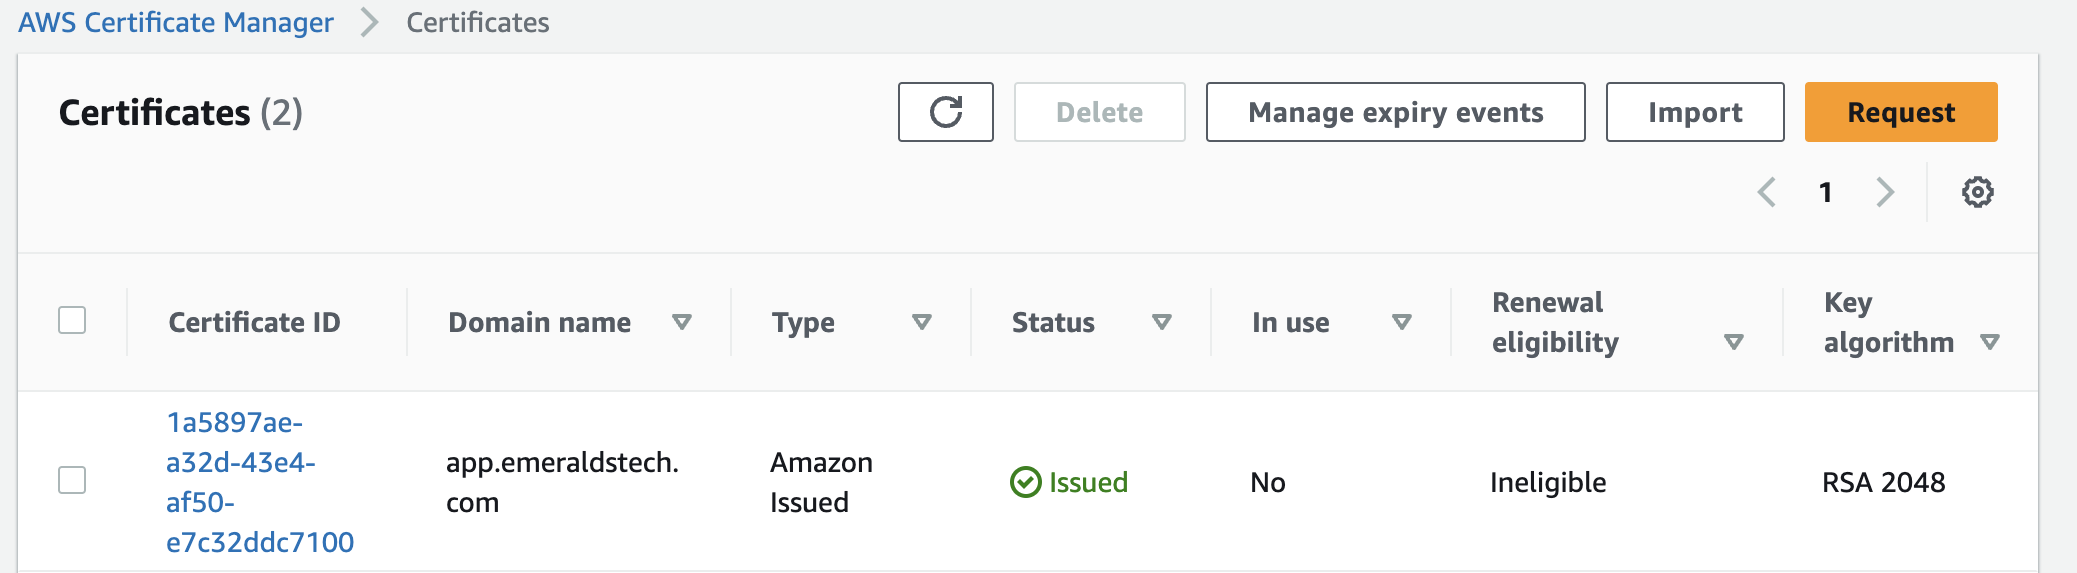
Now my SSL certificate has been created successfully 🎉
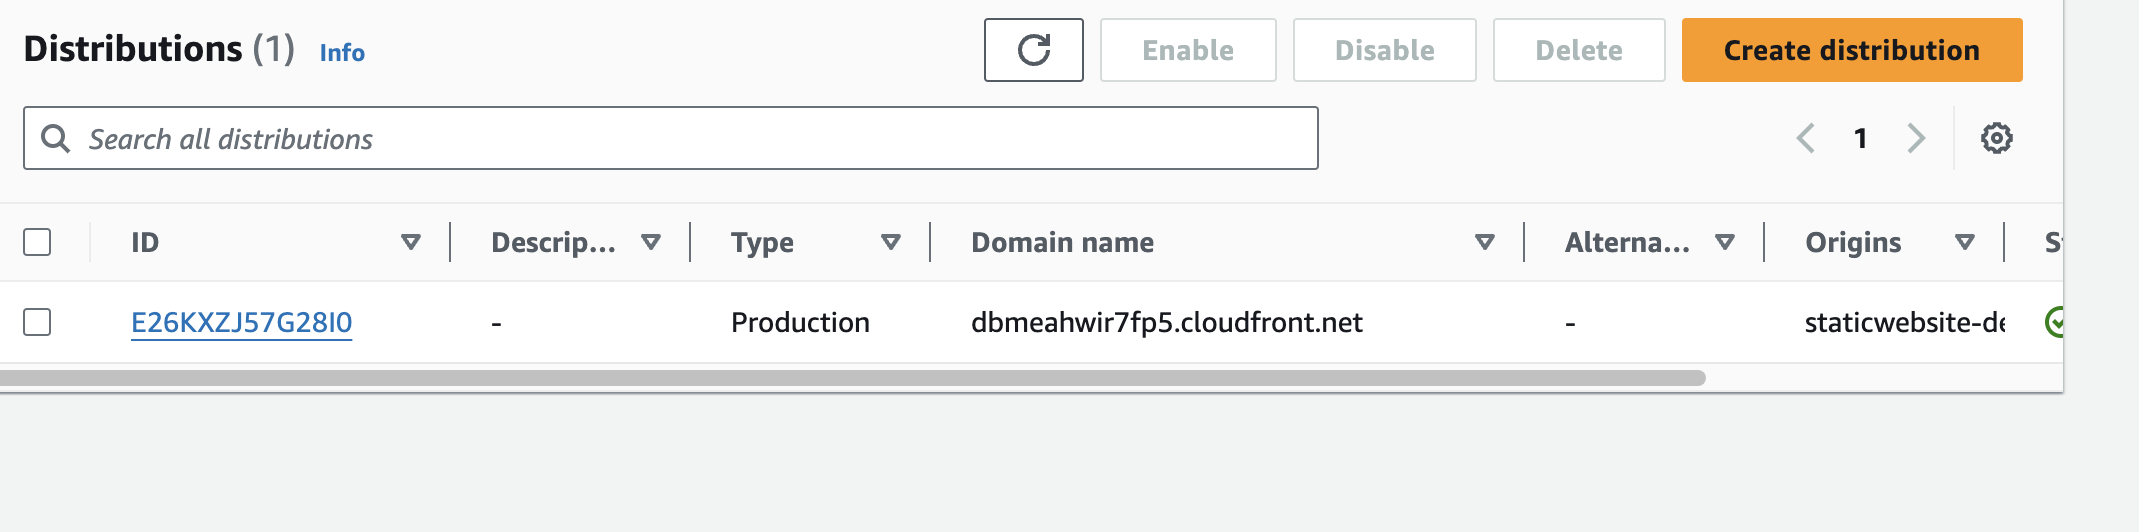
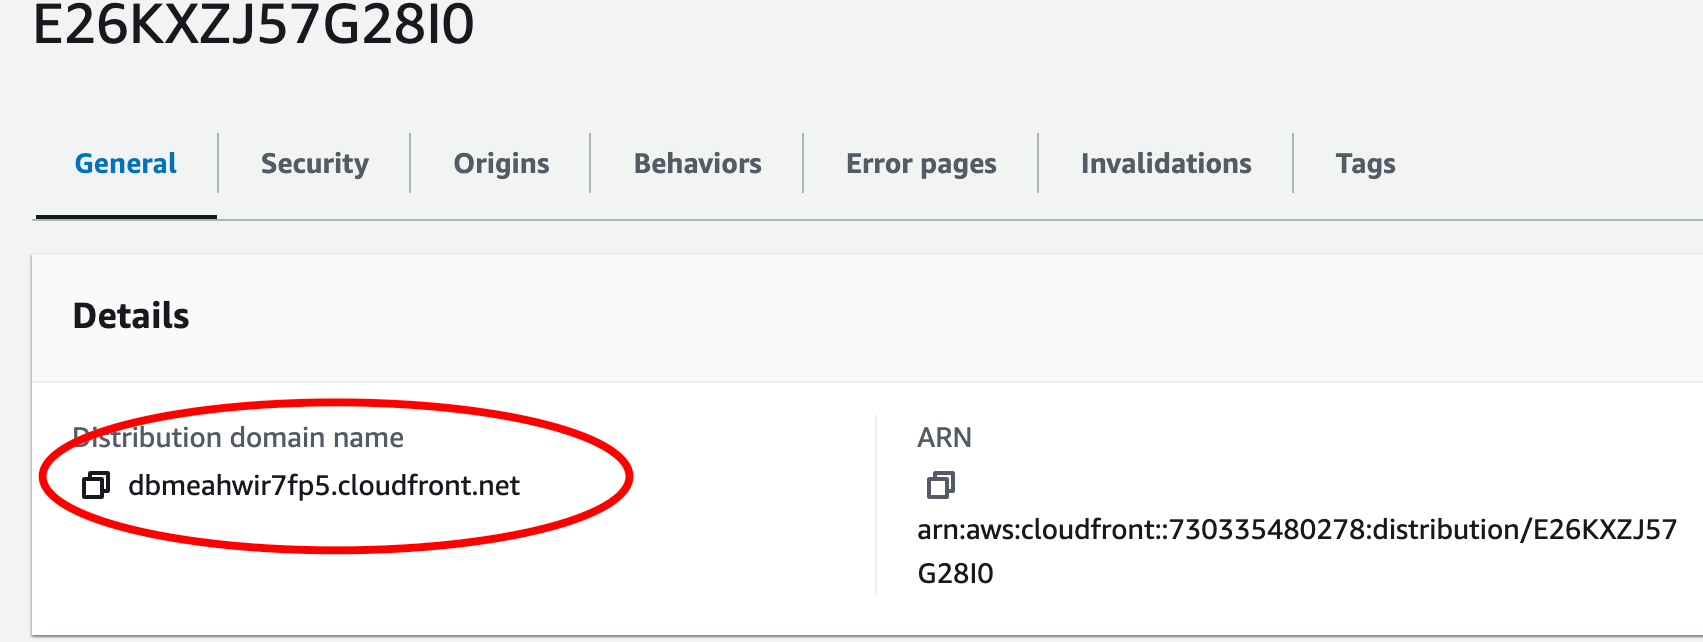
Navigate to CloudFront: Log in to the AWS Management Console and navigate to the CloudFront service.
Select Your Distribution: Choose the CloudFront distribution associated with your S3 website.
Go to the "Behaviors" Tab: Click on the "Behaviors" tab within your distribution settings.
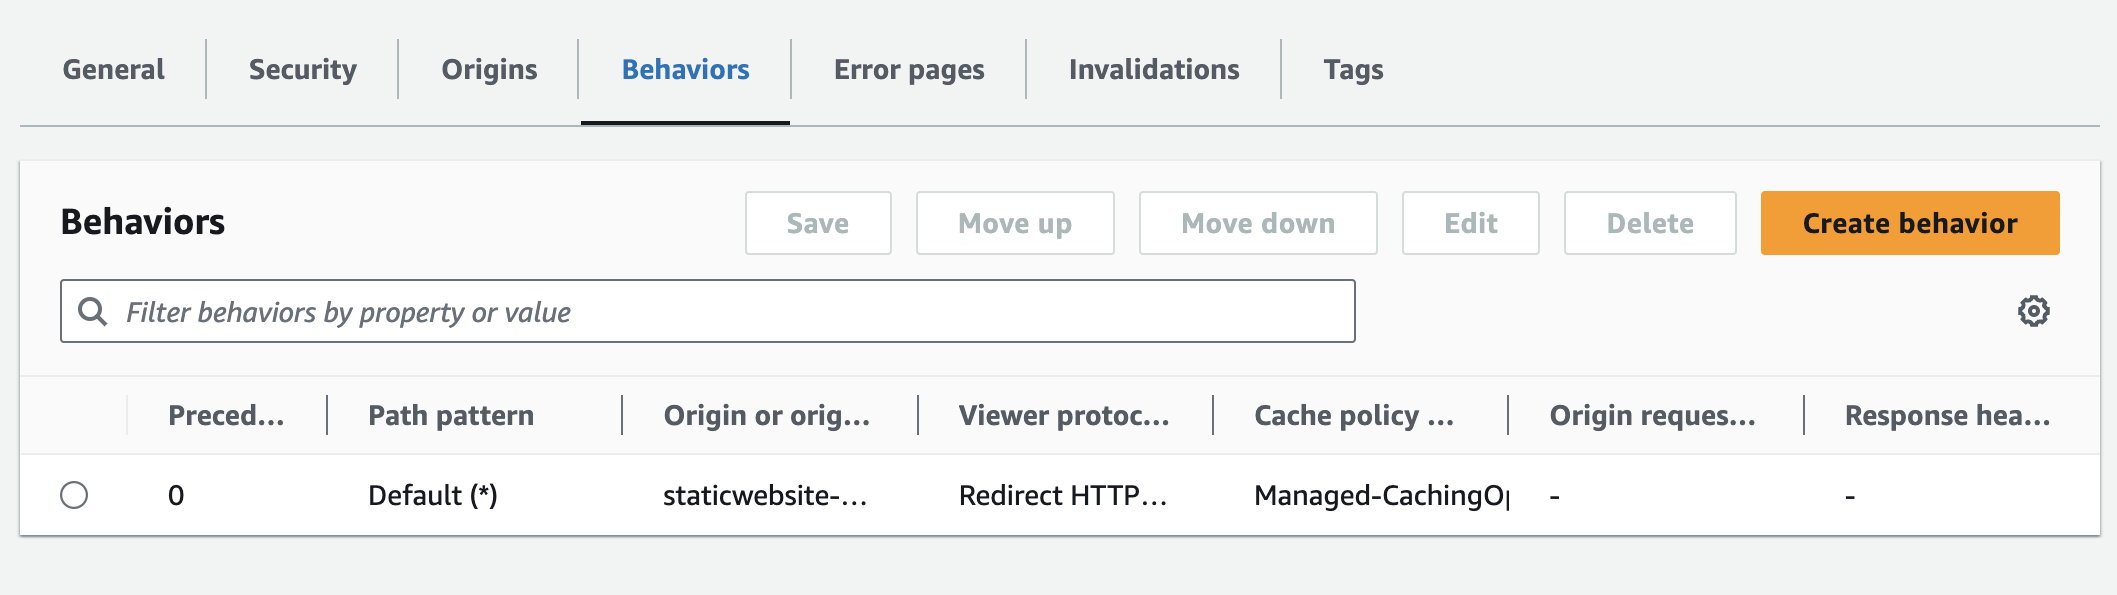
Edit the Default Behavior (or Create a New One): If you have a single behavior for your website, click "Edit." If you have specific configurations for different file types, create a new behavior for your custom domain.
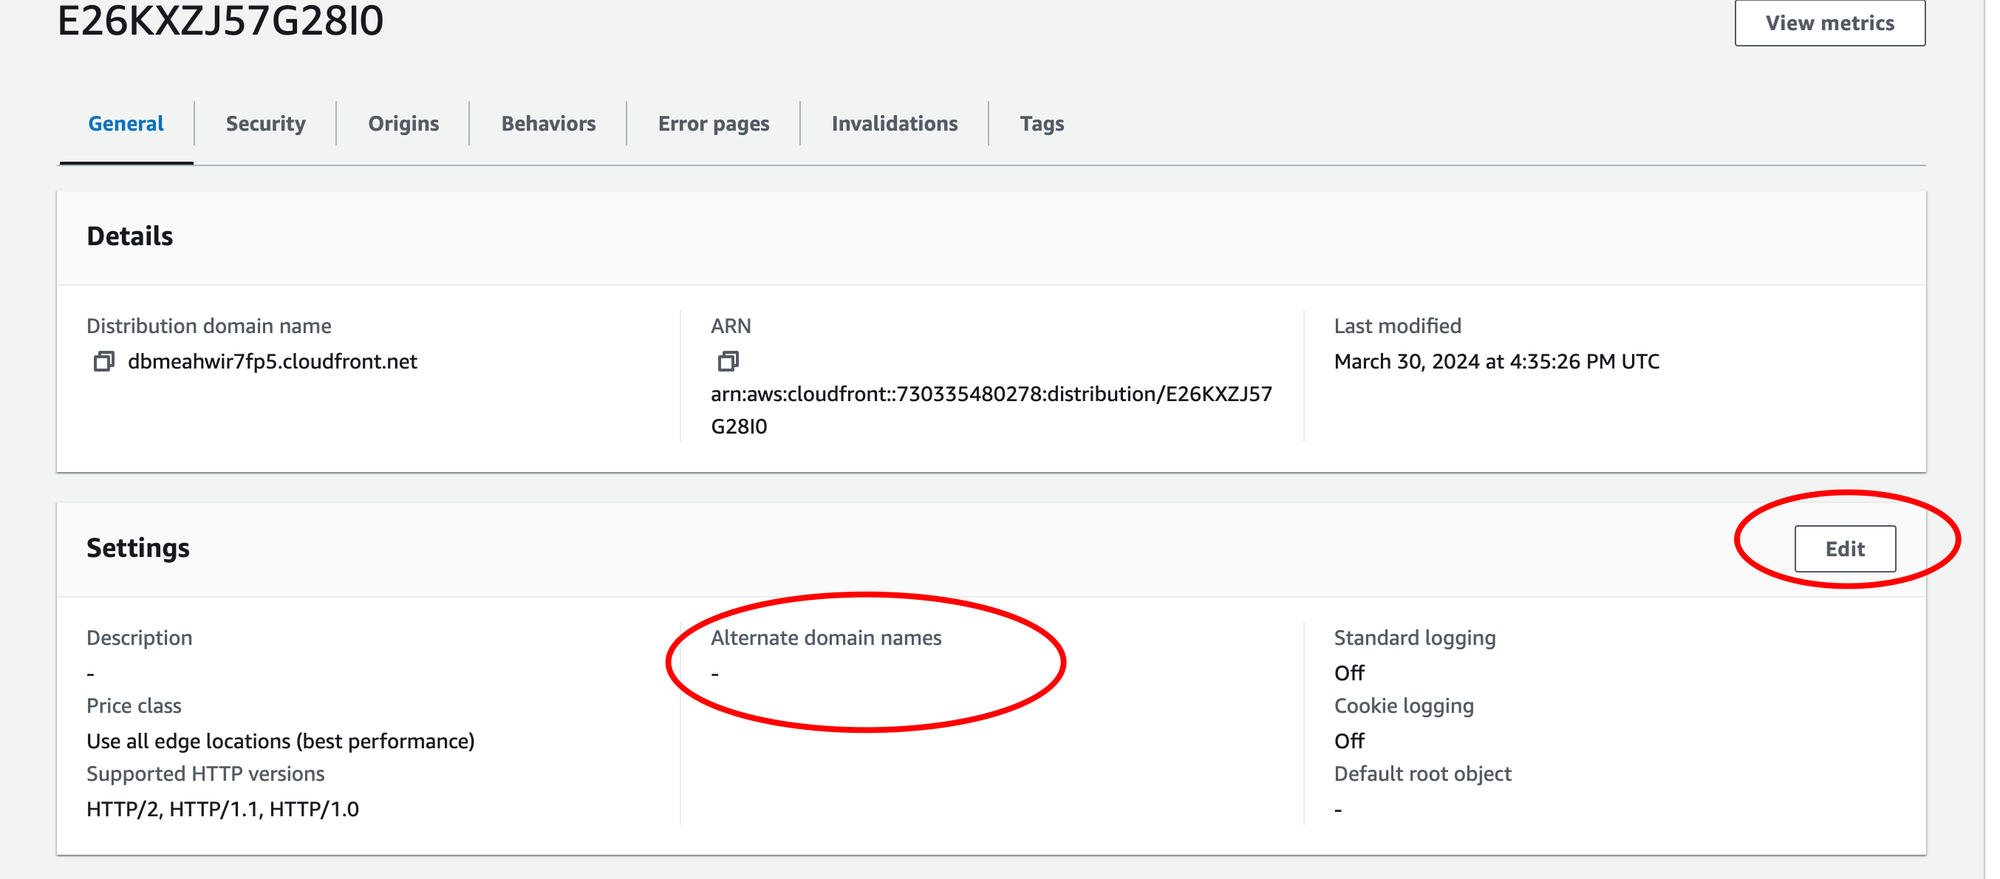
Set "Alternate Domain Names (CNAMEs)": Under "Domain Name Settings," enter your custom domain name in the "Alternate Domain Names (CNAMEs)" field (without "http://" or "https://").
Specify SSL Certificate: Scroll down to the "SSL Certificate" section. Choose "Custom SSL certificate" and select the SSL certificate you obtained for your custom domain from the dropdown list.

Review and Save: Double-check your configurations and click "Save" to apply the changes.
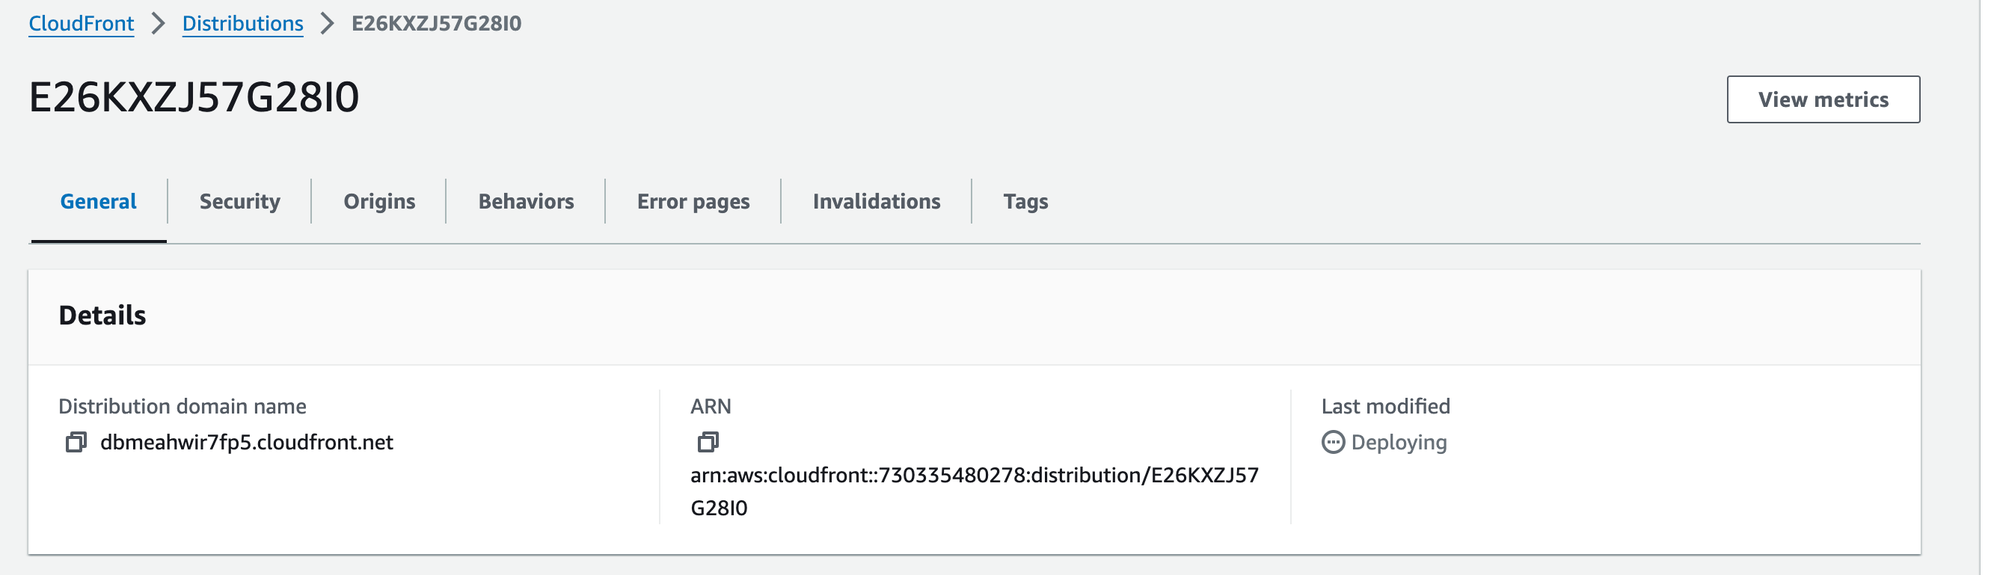
This will deploy my new configuration on CloudFront. It might take a few min once it's deployed you can check website will be available with a custom domain along with SSL.
For this to happen we need to point our custom domain (app.emeraldstech.com) to your CloudFront distribution.
Now I will point app.emeraldstech.com to CloudFront distribution.
Let me Navigate to AWS route53 and add this CNAME Record.
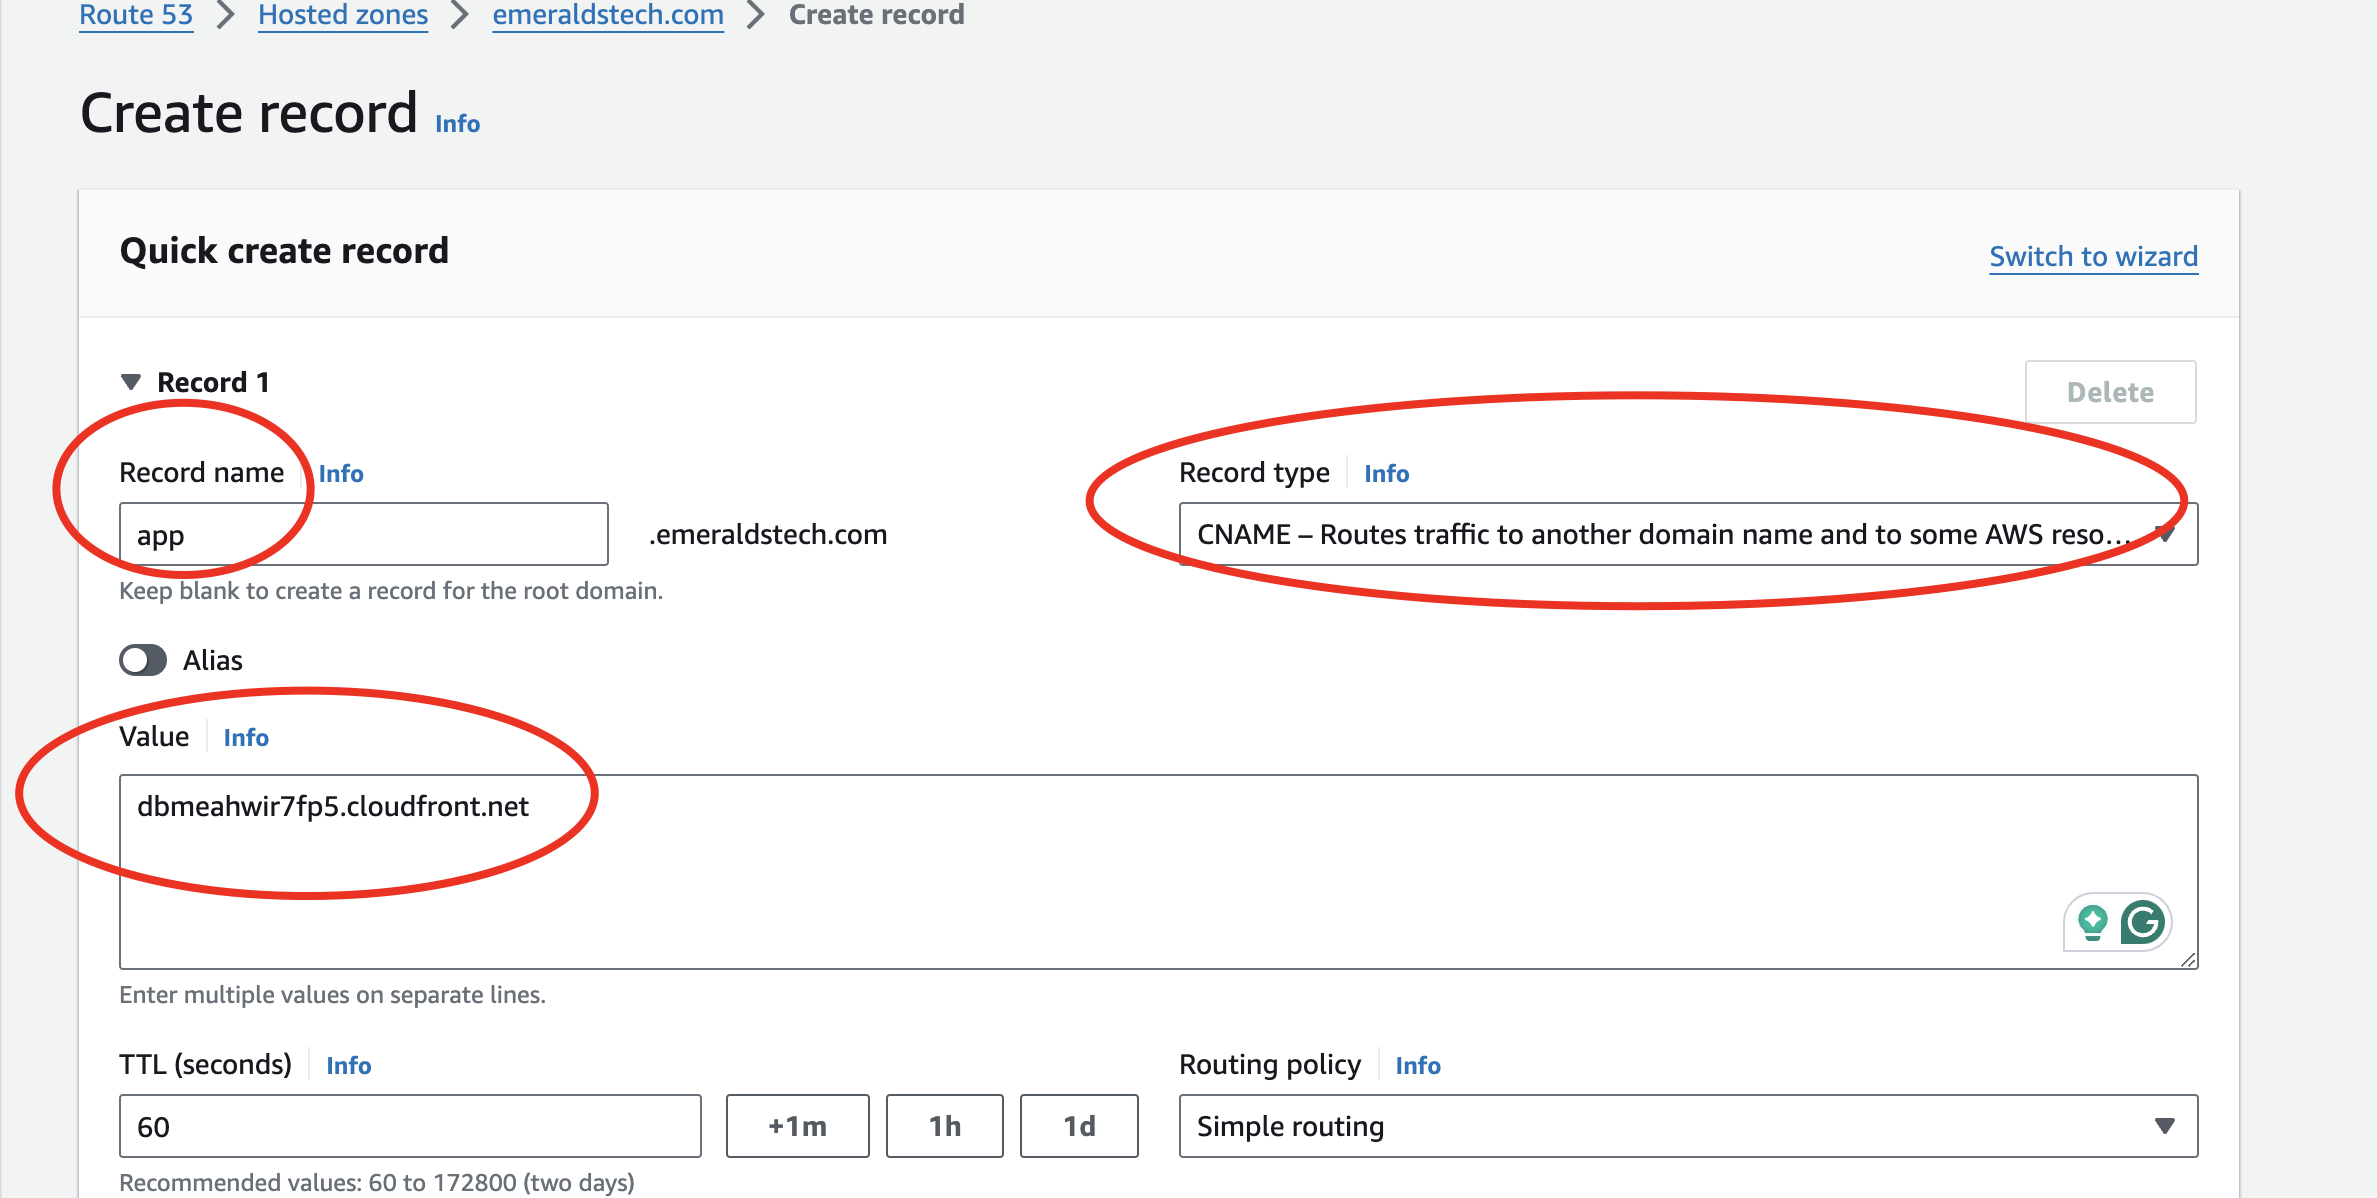
With the above step, we successfully added a custom domain to AWS CloudFront with SSL.